|
TABLE OF CONTENTS
JD Introduction and Setup
1. Getting Started with JD 2. Using The Robot Program 3. Introduction to Robotics 4. JD Box Contents 5. Battery Care & Charging 6. Building JD Humanoid 7. Connecting to JD over WiFi 8. Using a USB Wi-Fi Dongle 9. Fine Tune JDs Servos 10. Care for JD 3D Printing for JD 1. 3D Print Files for JD Mobile App for JD 1. Using JD with Mobile App General CoursesSoftware 1. ARC for Windows PC 2. Example Projects 3. Controls 4. Getting Help with Controls 5. ControlCommand() 6. Virtual Desktops 7. RoboScratch 8. Blockly 9. EZ-Script Mobile Software 1. Create a Mobile App Linear Programming 1. Create a Scene Using RoboScratch (Big Hero Six) 2. Create a Scene using Blockly (Avengers) Logical Programming 1. Programming Concepts (Variables, If/Else, Logic) 2. Counting Up 3. Counting Down Camera Input 1. Introduction to the EZ-B Camera 2. Face Detection with RoboScratch 3. Face Detection with Blockly 4. Face Detection with EZ-Script 5. Color Tracking with Servos 6. Color Tracking with Movement 7. Detecting Multiple Colors 8. Line Following with Roli, AdventureBot and Shell-E 9. Vision - Object Training & Recognition 10. Glyphs to Control Robot Movement 11. Detecting Glyphs & Augmented Reality 12. QR Code Detect 13. Microsoft Cognitive Emotion 14. Microsoft Cognitive Vision Audio Input 1. Speech Recognition RGB Output 1. RGB Animations Positioning 1. Servo Control 2. Introduction to Servo Motors 3. Create a Robot Dance 4. Program Robot to Dab 5. Program Robot to Play Piano 6. MYO Gesture Armband Navigation and Movement 1. Movement Panels 2. Navigating using RoboScratch 3. Navigating using Blockly Creative Applications 1. Customize Your EZ-Robot 2. Control Robot From Twitter 3. Nest Thermostat EZ-B v4 Robot Brain 1. EZ-B v4 Robot Brain Overview 2. DIY Autonomous Robot Vehicle 3. EZ-B v4 and IoTiny Wi-Fi Modes 4. Change WiFi Name 5. Resetting Your EZ-B v4 or IoTiny 6. USB WiFi or Ethernet Adapter Robot Troubleshooting 1. Which Robot are You Using? |
Battery Care & ChargingIntroduction
LiPo batteries are excellent for delivering consistent power throughout the duration of each charge cycle. Follow these instructions to ensure you maximize battery longevity, enjoyment and safety. Your EZ-Robots includes a Balance Charger for the 7.4v LiPo battery including AC/Mains adapters for international countries. Charge Before First Use
EZ-Robots are shipped with the LiPo batteries partially charged. The battery must be fully charged before using it. Not fully charging the LiPo battery before use may reduce maximum capacity and is detrimental to the longevity of LiPo batteries. Disconnect After Charged Keeping a battery connected to the charger after it has fully charged may drain the battery. Disconnect the battery from the charger once the charging process has completed. Battery Monitor LiPo stands for Lithium Polymer or Lithium-ion Polymer. LiPo batteries should never be drained past the battery monitor limits. The EZ-B v4 includes a battery-saver feature that audibly notifies you when the battery is low and needs charging. This feature will also not allow any further use of the robot until it has been charged. Upon hearing the verbal "low battery" indicator, the robot needs to be shut off immediately, to avoid draining the battery. Disabling the battery monitor increases the risk of damaging the LiPo. When a LiPo battery is drained below the recommended threshold, it will begin to "puff up" and swell. A swollen/puffy battery not only performs poorly but may become unsafe and possibly cause a fire. *Warning: Do not turn on your robot's power switch while the battery charger is connected to the battery. Doing so may cause the battery to overheat and become damaged, leading to a fire. 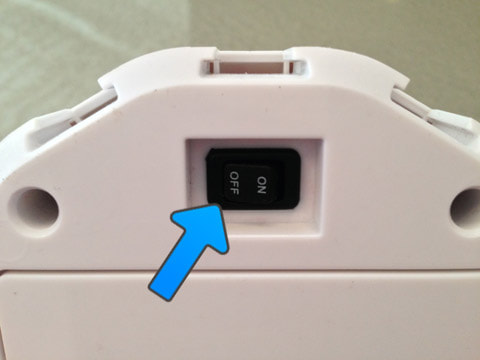
Cool Down
For optimal battery performance, provide a 30-minute minimum cool-down period after use, prior to recharging the battery. Cool the battery and robot away from direct sunlight before charging. Batteries may be recharged many times per day when a 30-minute cool down period is provided. Replacement Batteries
Optionally, you can buy replacement batteries from the shop. Charging Locations
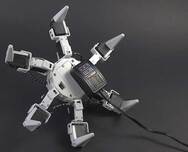
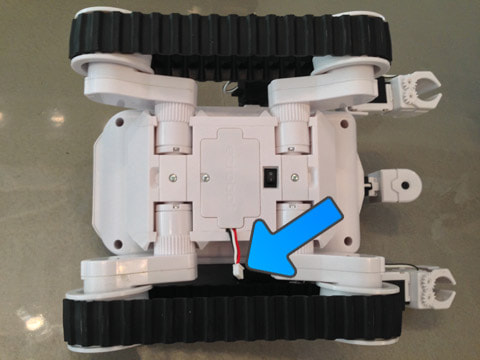
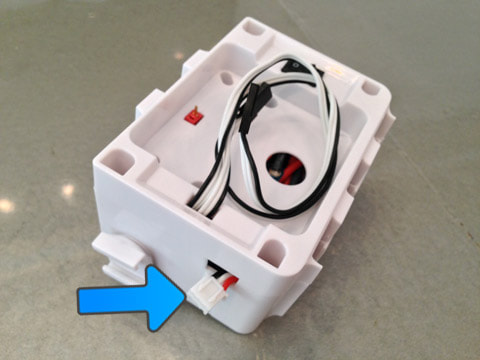
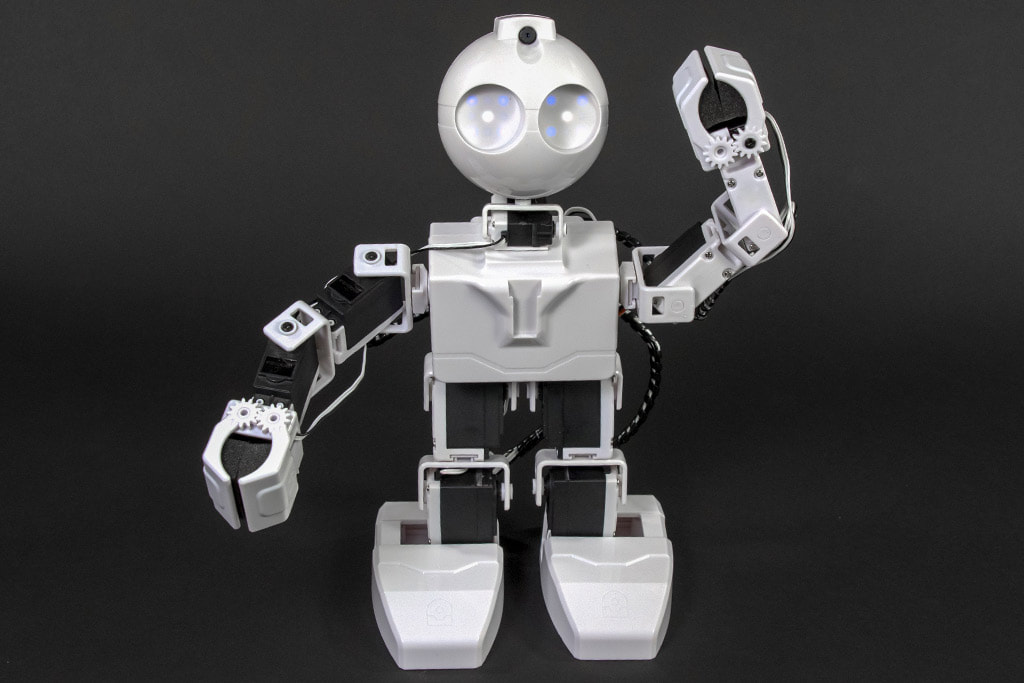
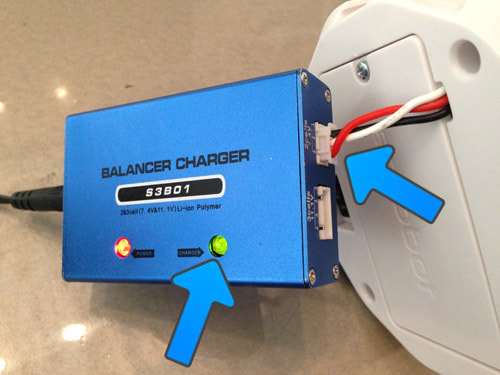
Connect the battery charging cable into the balance charger port. The images below show where to find the battery charging cable on all three Revolution robots bodies.
Charger Manuals

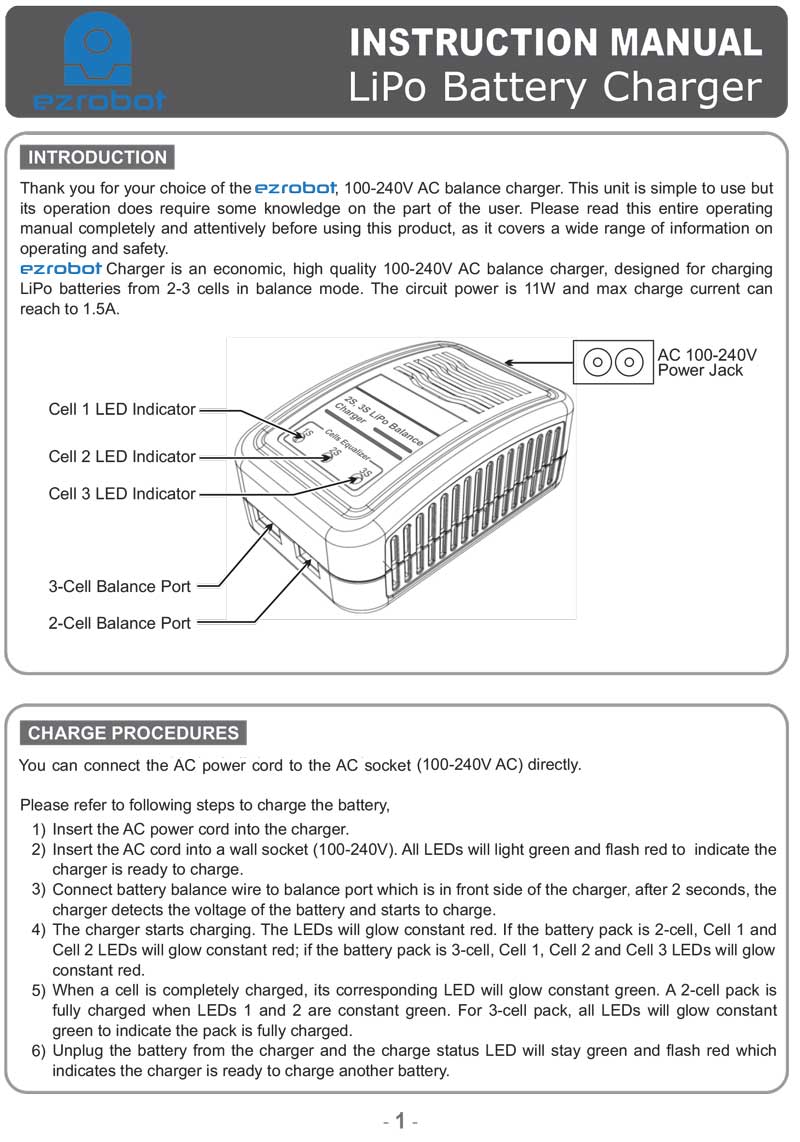
Version 3
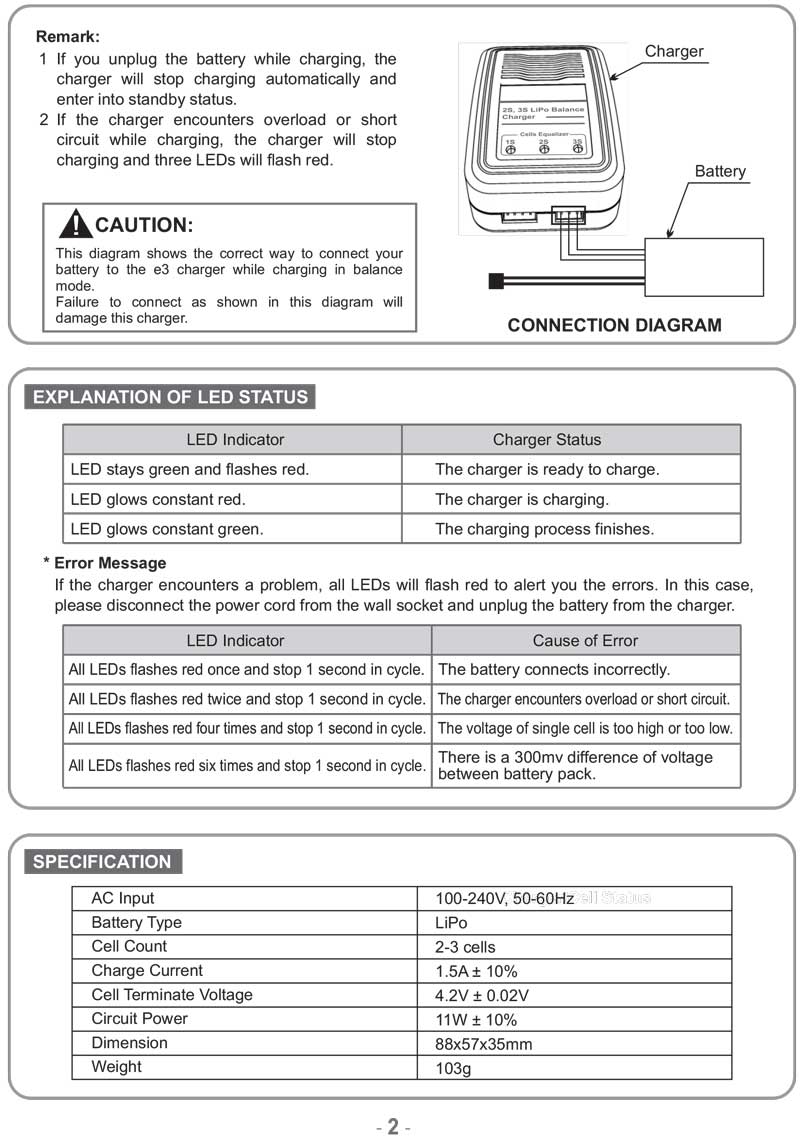
The latest EZ-Robot charger is also the easiest and most reliable. Instructions for this charger are very straight forward. Connect the charger to the AC Mains power outlet and verify the power LED is lit. Connect the battery to the appropriate charger port. The charging status LEDs are detailed below.
Power (Red): Power Charging (Red): Currently Charging Charging (Green): Charging Complete 
Version 2

Version 1
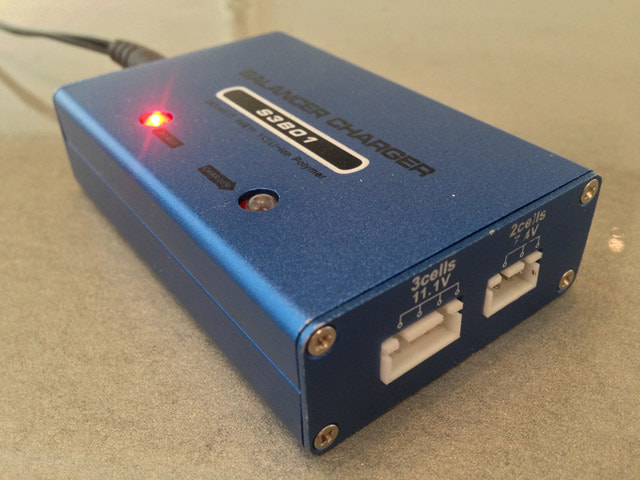
The RED LED indicates that AC/Mains power has been supplied to the charger. If there is not a battery connected to the charger, the GREEN light should be off.
Notice the GREEN light when the battery is charging. The balance charger detects the battery voltage and begins charging the battery when the GREEN light glows.
*Note: The charger will get quite warm (hot in some cases) while the battery is charging. This is normal and depends on how much charging the battery requires. 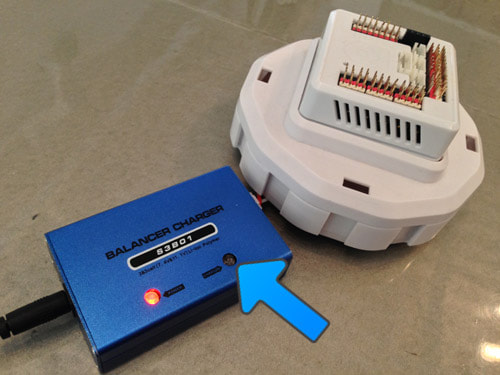
When the GREEN light stops glowing, the battery is charged. Charging the battery should not take longer than 3 hours. In most cases, it will take less than 1.5 hours to charge from the level of the EZ-B v4's Battery Saver.
|