|
TABLE OF CONTENTS
Software 1. ARC for Windows PC 2. Example Projects 3. Controls 4. Getting Help with Controls 5. ControlCommand() 6. Virtual Desktops 7. RoboScratch 8. Blockly 9. EZ-Script Mobile Software 1. Create a Mobile App Linear Programming 1. Create a Scene Using RoboScratch (Big Hero Six) 2. Create a Scene using Blockly (Avengers) Logical Programming 1. Programming Concepts (Variables, If/Else, Logic) 2. Counting Up 3. Counting Down Camera Input 1. Introduction to the EZ-B Camera 2. Face Detection with RoboScratch 3. Face Detection with Blockly 4. Face Detection with EZ-Script 5. Color Tracking with Servos 6. Color Tracking with Movement 7. Detecting Multiple Colors 8. Line Following with Roli, AdventureBot and Shell-E 9. Vision - Object Training & Recognition 10. Glyphs to Control Robot Movement 11. Detecting Glyphs & Augmented Reality 12. QR Code Detect 13. Microsoft Cognitive Emotion 14. Microsoft Cognitive Vision Audio Input 1. Speech Recognition RGB Output 1. RGB Animations Positioning 1. Servo Control 2. Introduction to Servo Motors 3. Create a Robot Dance 4. Program Robot to Dab 5. Program Robot to Play Piano 6. MYO Gesture Armband Navigation and Movement 1. Movement Panels 2. Navigating using RoboScratch 3. Navigating using Blockly Creative Applications 1. Customize Your EZ-Robot 2. Control Robot From Twitter 3. Nest Thermostat EZ-B v4 Robot Brain 1. EZ-B v4 Robot Brain Overview 2. DIY Autonomous Robot Vehicle 3. EZ-B v4 and IoTiny Wi-Fi Modes 4. Change WiFi Name 5. Resetting Your EZ-B v4 or IoTiny 6. USB WiFi or Ethernet Adapter Robot Troubleshooting 1. Which Robot are You Using? |
EZ-ScriptARC provides three options for text-based coding: Python, JavaScript, and EZ-Script.
EZ-Script was the native programming language for EZ-Builder, which was the predecessor to ARC, and this Tutorial will focus on EZ-Script. Similar to Basic and C++, the language is very powerful and easy to learn. ARC presents intellisense scripting input. As you begin typing each new line of code, ARC will automatically display all possible commands that start with the characters you typed in. ARC also includes the entire script manual with syntax examples for every function in the code editors. Every control within ARC has scripting capability to programmatically configure settings. Scripting Controls Within the Add Control dialog box of ARC, is a section for Scripting Controls. The controls within this category are standalone Scripting Controls. Keep in mind that nearly every control has scripting capability within their configuration dialog as well. 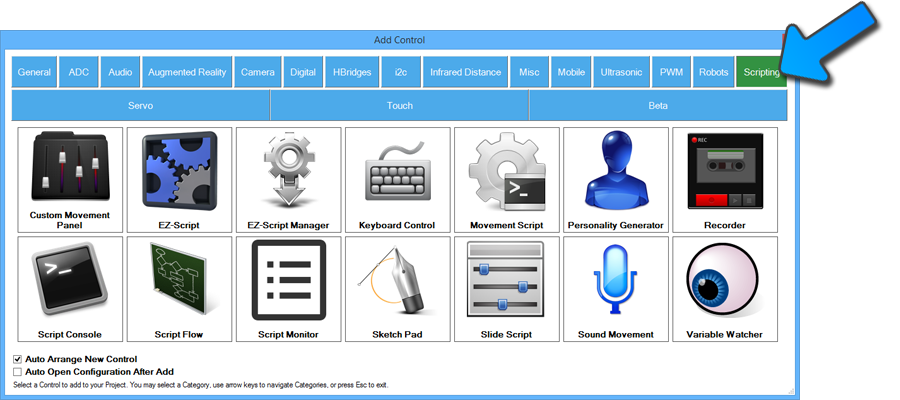
Edit Scripts Within the configuration dialog of nearly every control is the ability to edit scripts to define specific behaviors, such as when to start tracking using the camera. The script editors are input fields with a pencil icon to the right. If you are entering a single line of EZ-Script, you can simply enter it in the input field. If you are entering multiple lines of EZ-Script, or require guided assistance, press the pencil button to open the Script Editor Dialog. In this example, we are displaying the configuration dialog for the WiiMote. 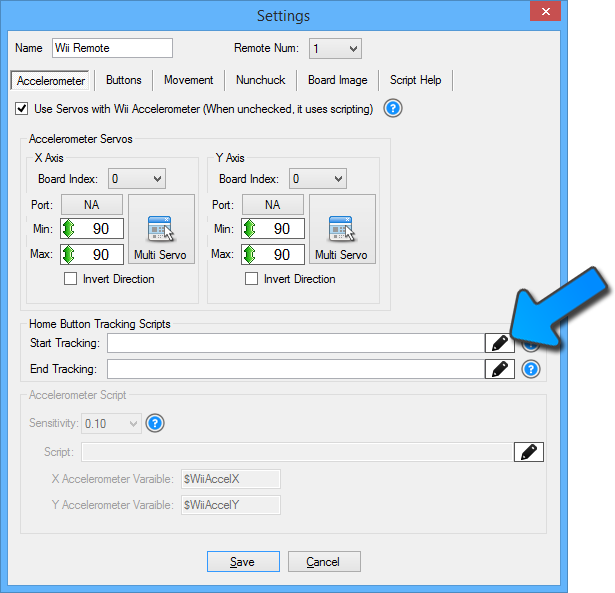
Editor Dialog The editor dialog consists of an input section on the left and reference assistance on the right. The window can be resized or maximized and will remember the last size for future use. 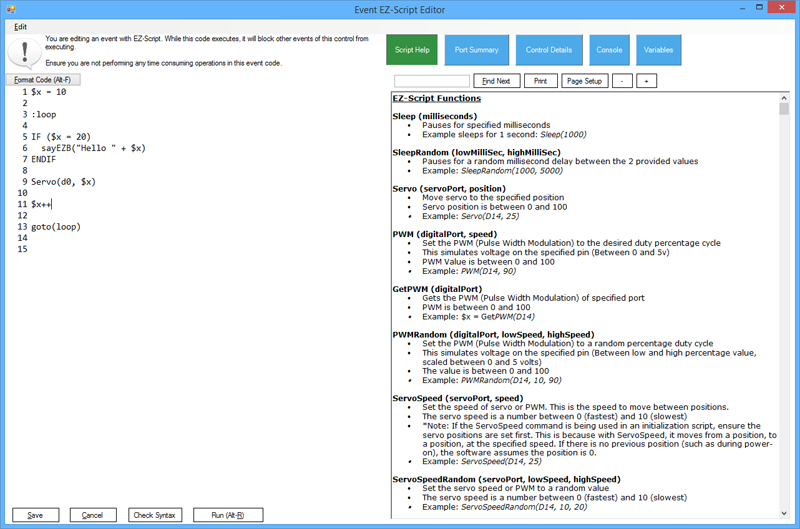
Intelligent Code Completion (IntelliSense) As you begin typing EZ-Script, the intelligent code complete will present a selection of functions based on your input. You may use the arrow Up/Down keys to select the appropriate command or continue typing. Pressing the ESC key will hide the dialog. 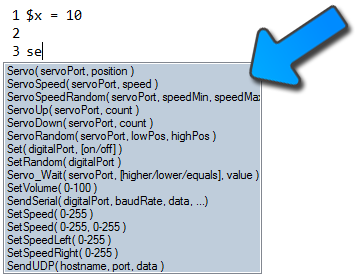
Port Summary The page of the next tab from the Script Manual is the Port Summary. This page displays how the ports of the EZ-B are being used. The summary is manually entered in the Project Details section. Creating a port summary helps you know what is connected to the EZ-B ports. You will define what is connected to each port, for example, Left Arm Servo or Right Leg Servo. 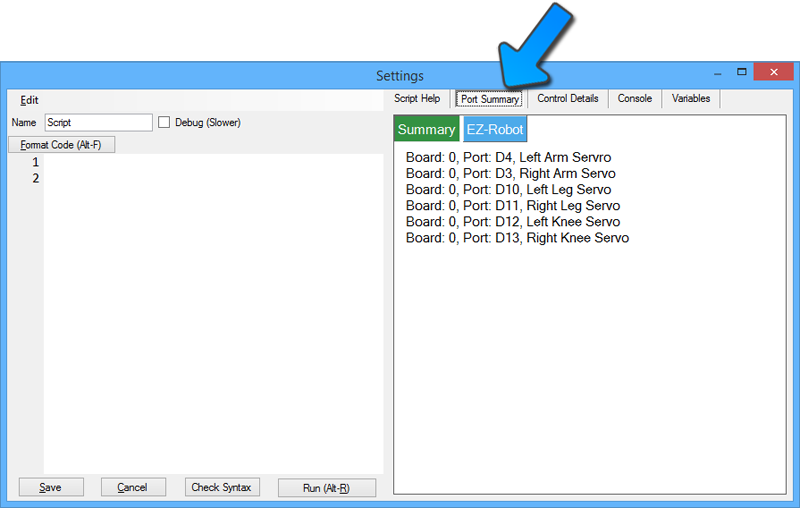
Cheat Sheet The third tab of the editor dialog is the Cheat Sheet. This is a very powerful tab, as it automatically generates code for you based on the project configuration. This tab analyzes the project and determines what functions are available from each control. The ControlCommand() EZ-Script function is how you programmatically set parameters between ARC Controls. The Cheat Sheet tab will display all available ControlCommand() parameters for all controls in your project. Clicking on a ControlCommand() in the list will be added to your script editor. 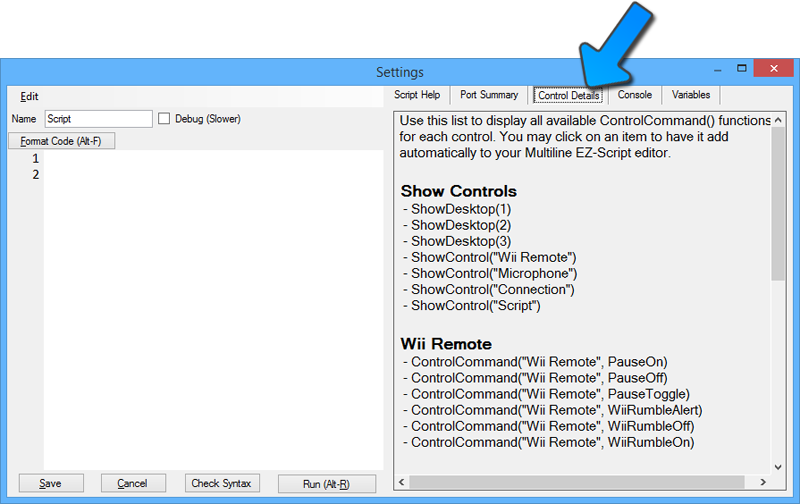
Console The fourth tab is a temporary Console for Output while testing your script. The console will display the output of a Print() function or any compiler errors. When you press the Run button to test your script, the output will be displayed in this Console tab. 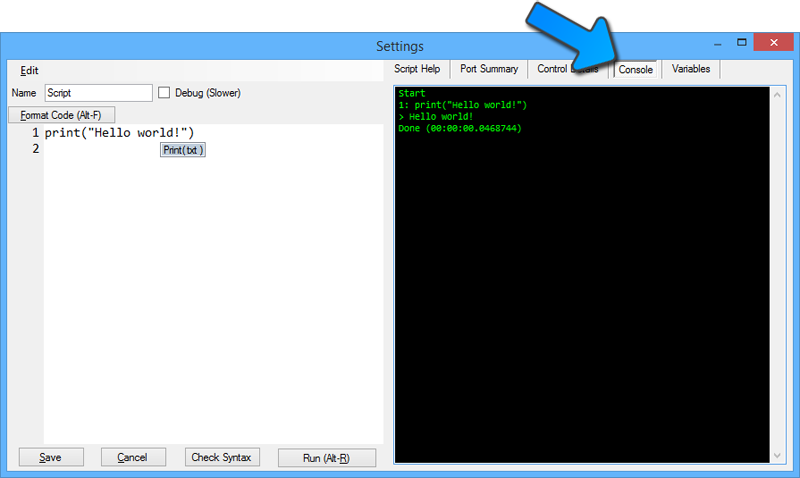
Variables The last tab is the variables page. This will list all variables that are currently assigned in the compiler. EZ-Script variables are global, so all Controls and Scripts can share the variables. The value of each variable is also displayed, including the values within arrays. Clicking on a variable name will add the text to your script editor. *Note: Remember that you must define a variable before it can be used. For example, if you wish to check the value of a variable using an IF condition, then you must have already had the variable assigned with a value. Think of it this way; you can't check a value if the variable is empty (i.e. not defined). 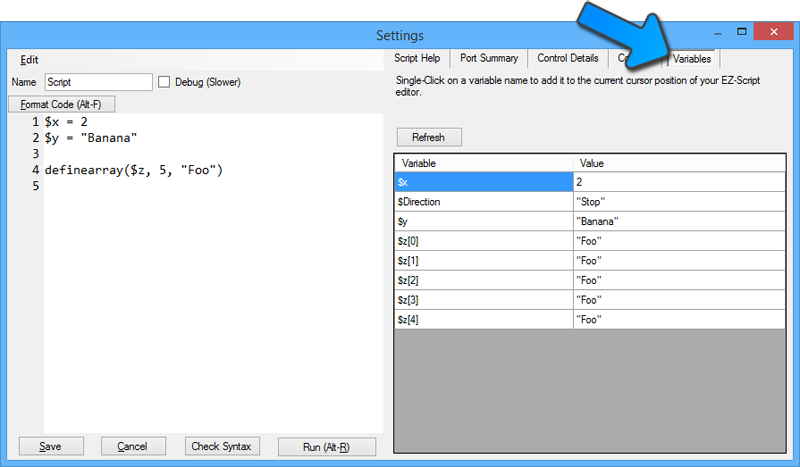
Clipboard Functions Microsoft Windows includes clipboard functions native to all text controls. By selecting text, the keyboard shortcut CTRL-C can be used to COPY the text. Later, the keyboard shortcut CTRL-V can be used to PASTE the text from the clipboard. Additionally, there is also the ability to CUT text, which removes the text from the editor into the clipboard. To CUT text, select the text and press the shortcut CTRL-X. Later, the pasting shortcut can be used to PASTE the cut text (CTRL-V). CTRL-X (cut) CTRL-C (copy) CTRL-V (paste) *Note: Be sure to hold the CTRL (control) key while pressing the secondary key (X, C or V). Do not let go of the CTRL (control) key until you have pressed the secondary key. Once you have pressed the secondary key, simply let go of both keys and the action has been executed. 
|