|
TABLE OF CONTENTS
Software 1. ARC for Windows PC 2. Example Projects 3. Controls 4. Getting Help with Controls 5. ControlCommand() 6. Virtual Desktops 7. RoboScratch 8. Blockly 9. EZ-Script Mobile Software 1. Create a Mobile App Linear Programming 1. Create a Scene Using RoboScratch (Big Hero Six) 2. Create a Scene using Blockly (Avengers) Logical Programming 1. Programming Concepts (Variables, If/Else, Logic) 2. Counting Up 3. Counting Down Camera Input 1. Introduction to the EZ-B Camera 2. Face Detection with RoboScratch 3. Face Detection with Blockly 4. Face Detection with EZ-Script 5. Color Tracking with Servos 6. Color Tracking with Movement 7. Detecting Multiple Colors 8. Line Following with Roli, AdventureBot and Shell-E 9. Vision - Object Training & Recognition 10. Glyphs to Control Robot Movement 11. Detecting Glyphs & Augmented Reality 12. QR Code Detect 13. Microsoft Cognitive Emotion 14. Microsoft Cognitive Vision Audio Input 1. Speech Recognition RGB Output 1. RGB Animations Positioning 1. Servo Control 2. Introduction to Servo Motors 3. Create a Robot Dance 4. Program Robot to Dab 5. Program Robot to Play Piano 6. MYO Gesture Armband Navigation and Movement 1. Movement Panels 2. Navigating using RoboScratch 3. Navigating using Blockly Creative Applications 1. Customize Your EZ-Robot 2. Control Robot From Twitter 3. Nest Thermostat EZ-B v4 Robot Brain 1. EZ-B v4 Robot Brain Overview 2. DIY Autonomous Robot Vehicle 3. EZ-B v4 and IoTiny Wi-Fi Modes 4. Change WiFi Name 5. Resetting Your EZ-B v4 or IoTiny 6. USB WiFi or Ethernet Adapter Robot Troubleshooting 1. Which Robot are You Using? |
DIY Autonomous Robot VehicleInterested in autonomous vehicles and curious how to make your own?
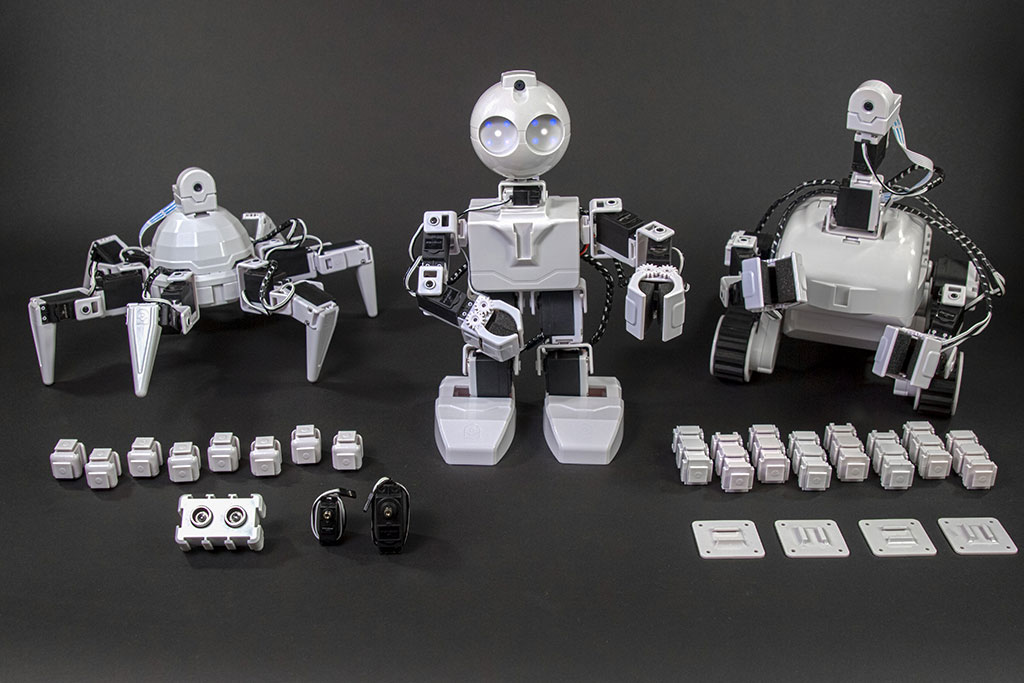
Well, we have what you are looking for! This activity demonstrates how to make an autonomous car out of a modified AdventureBot. However, you can use a Roli Rover or Six Hexapod as well! Using additional EZ-Bits, the AdventureBot was modified for the camera to sit on the left of the robot. This allows the robot to see the lines on the road and maintain the lines within the center of the camera view by turning the robot. The floor is darker than the lines, without bright reflection from ceiling lights. A custom multi-color filter was created to identify the lines on the road. Creating a custom color filter is also covered in the Detect Multiple Colors activity. The ARC (formerly EZ-Builder) mobile app for AdventureBot and Battle Flipper used in this video activity can be downloaded here. What You Will Need
Real Test Results
We took this robot to a real autonomous car testing track. Interested in the results? Watch the video below. DIY Race Track At Home
We taped small slits of bright green paper to the floor and created a track. The slits were separated to simulate the lanes of a road. Using With Roli or Six
This demo uses an AdventureBot, however it can easily be used with a Roli or Six. The good news about a Roli is the camera can be angled down to look at the ground. However, Six will require an additional servo to angle the camera down. How The Camera Control was Configured Step 1: A custom color filter was created to identify only the lanes on the floor. This uses the MultiColor option, and the tutorial to learn how to use it can be viewed HERE. 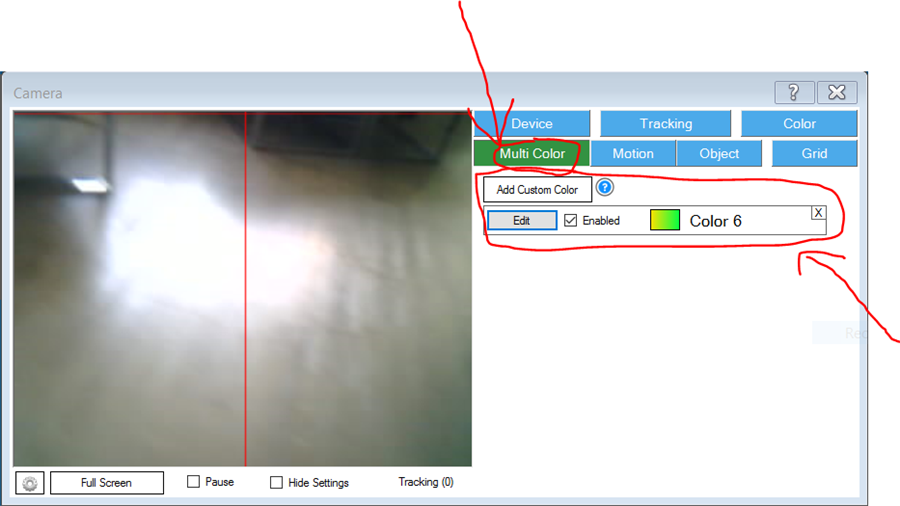
Step 2:
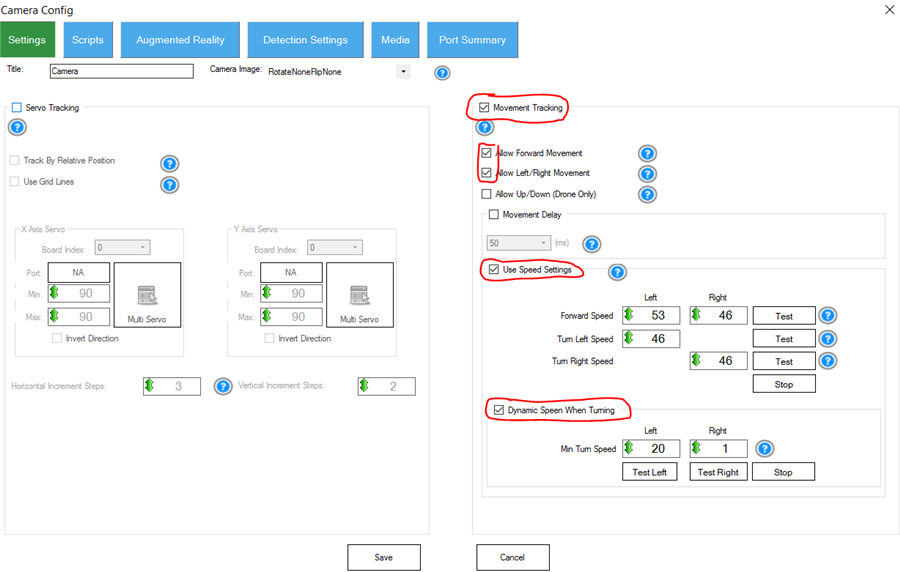
The camera control configuration is pressed to load the configuration setting window 
Step 3:
For Roli, AdventureBot and Battle Flipper: Enable the following checkboxes for
For Six: Do NOT check Dynamic Speed When Turning for SIX robot. Enable the following checkboxes for
Step 4:
By default, the Forward and Turn speeds may be too fast and the robot will simply drive away too quickly. This means the Forward, Left and Right speed values for tracking can be modified. Lower the values and press the TEST button for Forward to verify a slow forward speed. Then do the same for Left and Right. Press the Test buttons after each speed adjustment. Press STOP to stop the robot from moving. 
Step 5:
For Roli, AdventureBot and Battle Flipper, the Dynamic Speed When Turning values can now be adjusted. Do NOT check Dynamic Speed When Turning if using a Six robot. By default, these settings will have a value of 1. This is usually an okay value, however you can experiment and hover your cursor over the question mark to help to fine tune the values. 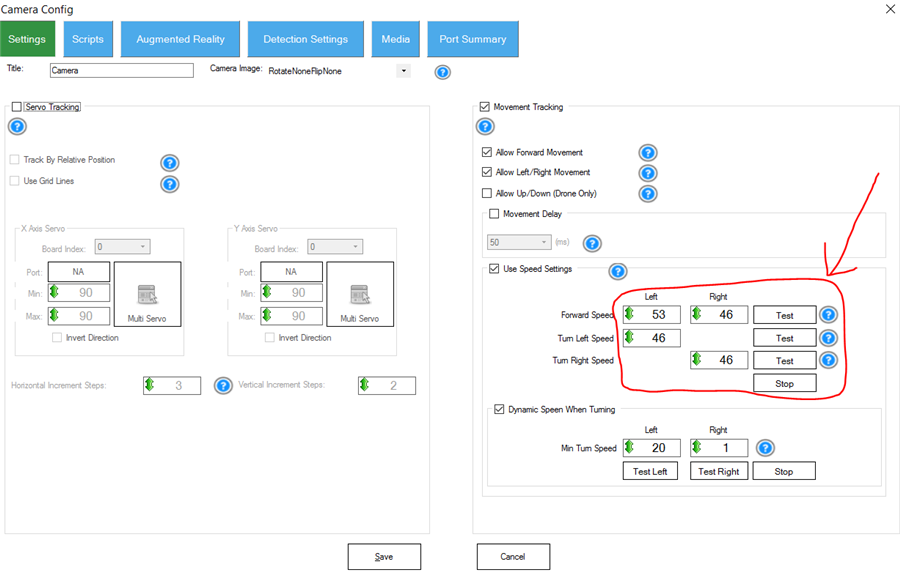
Step 6:
Switch to SCRIPTS tab and configure the Sort to TopToBottom. This will prioritize the detected objects at the top of the screen first. This means that the robot will follow the objects at the top of the screen higher priority than objects at the bottom 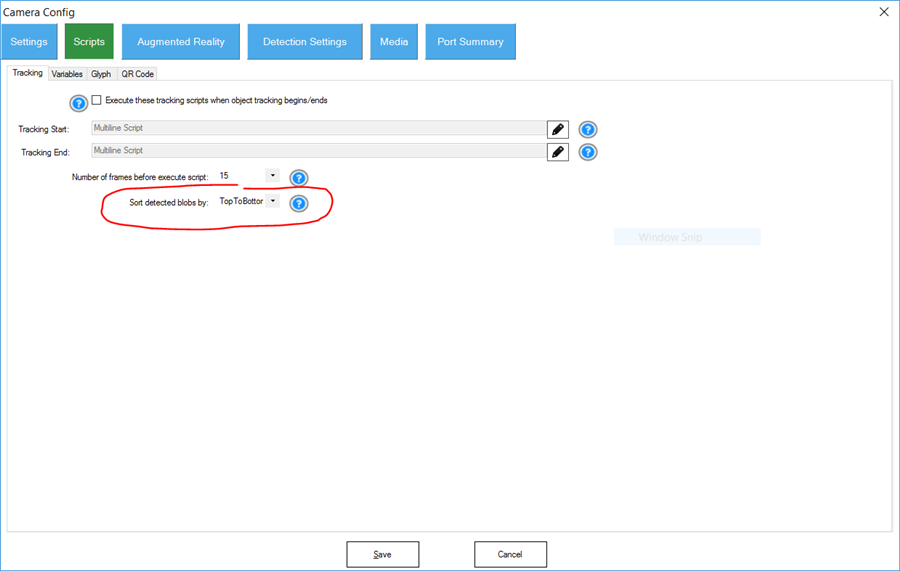
Step 7:
Press SAVE on the camera configuration window and enable Multi Color Tracking. Place the robot on the track and it should begin tracking. 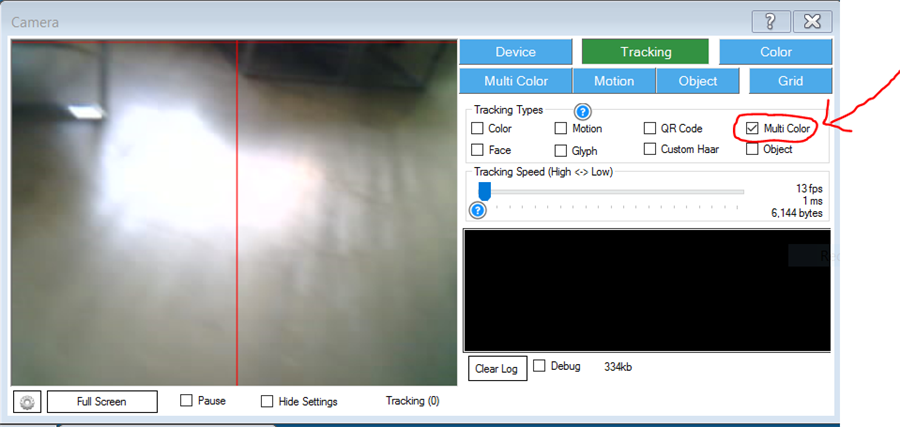
Things To Note
If the robot is detecting objects other than the specified color, consider tweaking the Multi Color settings to narrow the color range and remove False Positives. Building The Robot with AdventureBot or BattleFlipper The robot is a modified AdventureBot with additional EZ-Bits. However, you could use an AdventureBot with no modifications and have the robot follow the line. The difference with our modification moves the camera to the left and aims the camera down to see the road lane. If you use an unmodified AdventureBot, the camera may be facing too high and not detect the lines on the ground. |