|
TABLE OF CONTENTS
Software 1. ARC for Windows PC 2. Example Projects 3. Controls 4. Getting Help with Controls 5. ControlCommand() 6. Virtual Desktops 7. RoboScratch 8. Blockly 9. EZ-Script Mobile Software 1. Create a Mobile App Linear Programming 1. Create a Scene Using RoboScratch (Big Hero Six) 2. Create a Scene using Blockly (Avengers) Logical Programming 1. Programming Concepts (Variables, If/Else, Logic) 2. Counting Up 3. Counting Down Camera Input 1. Introduction to the EZ-B Camera 2. Face Detection with RoboScratch 3. Face Detection with Blockly 4. Face Detection with EZ-Script 5. Color Tracking with Servos 6. Color Tracking with Movement 7. Detecting Multiple Colors 8. Line Following with Roli, AdventureBot and Shell-E 9. Vision - Object Training & Recognition 10. Glyphs to Control Robot Movement 11. Detecting Glyphs & Augmented Reality 12. QR Code Detect 13. Microsoft Cognitive Emotion 14. Microsoft Cognitive Vision Audio Input 1. Speech Recognition RGB Output 1. RGB Animations Positioning 1. Servo Control 2. Introduction to Servo Motors 3. Create a Robot Dance 4. Program Robot to Dab 5. Program Robot to Play Piano 6. MYO Gesture Armband Navigation and Movement 1. Movement Panels 2. Navigating using RoboScratch 3. Navigating using Blockly Creative Applications 1. Customize Your EZ-Robot 2. Control Robot From Twitter 3. Nest Thermostat EZ-B v4 Robot Brain 1. EZ-B v4 Robot Brain Overview 2. DIY Autonomous Robot Vehicle 3. EZ-B v4 and IoTiny Wi-Fi Modes 4. Change WiFi Name 5. Resetting Your EZ-B v4 or IoTiny 6. USB WiFi or Ethernet Adapter Robot Troubleshooting 1. Which Robot are You Using? |
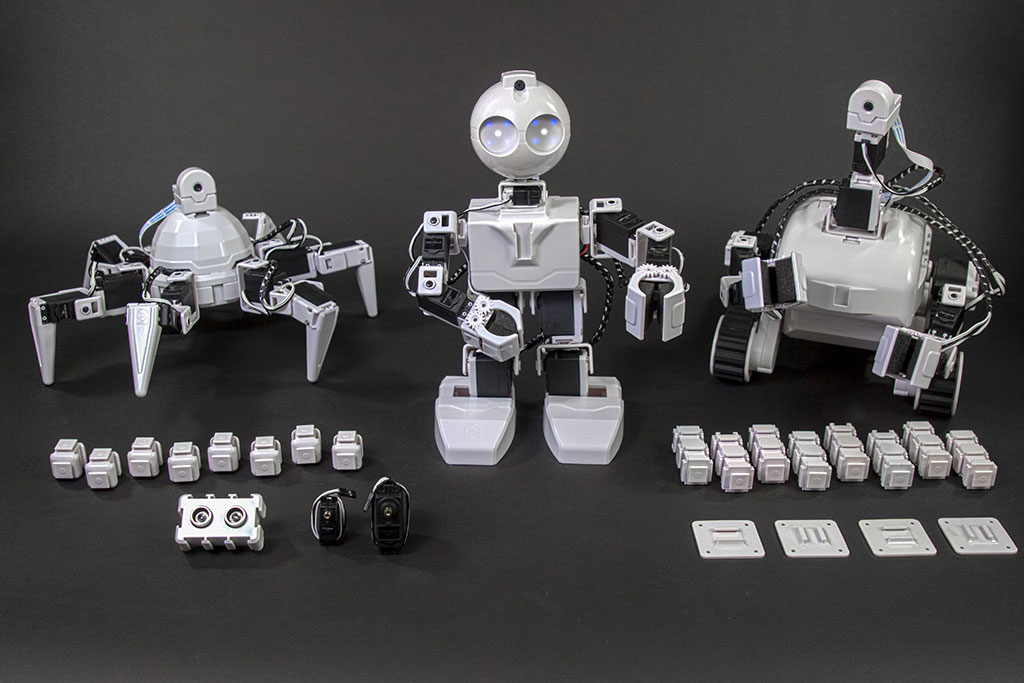
Servo ControlIntroduction Every control that uses servos has a Configuration Dialog for specifying the servo port and "minimum and maximum range." In this lesson, we will explain how to configure a servo (even multiple servos) to be moved from a Control. We will use a vertical servo slide control in this example, although this procedure applies to any control that uses servos. There are many controls that use servos, including WiiMote, Myo Armband, Camera and dozens more. What You Will Need
Step 1 Load ARC (formerly EZ-Builder). 
Step 2 Click on the Project Tab in the top menu and press the Add Control button. 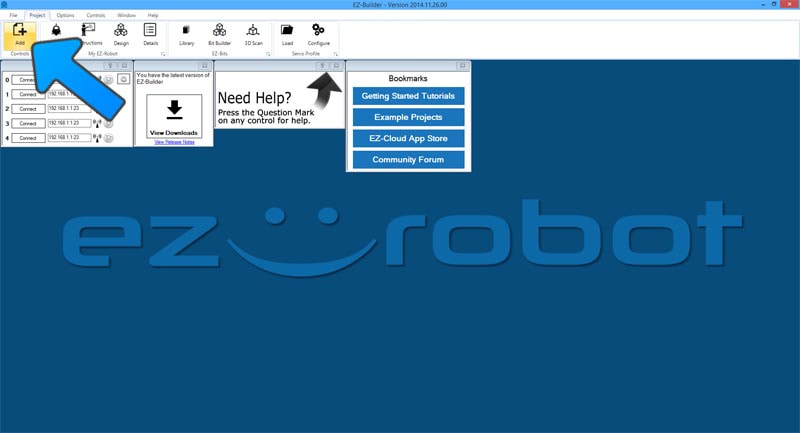
Step 3 The Add Skills Dialog will display. In this window, you can browse and select controls to add to your project. Press the SERVO Tab to view servo specific controls. 
Step 4 We are going to use the Vertical Servo control for this example. There are many kinds of controls that interact with servos. Nearly every control within ARC offers the ability to integrate servos, however only the specific servo controls are shown on this page. Click the Vertical Servo button to add the Vertical Servo Control to your project. 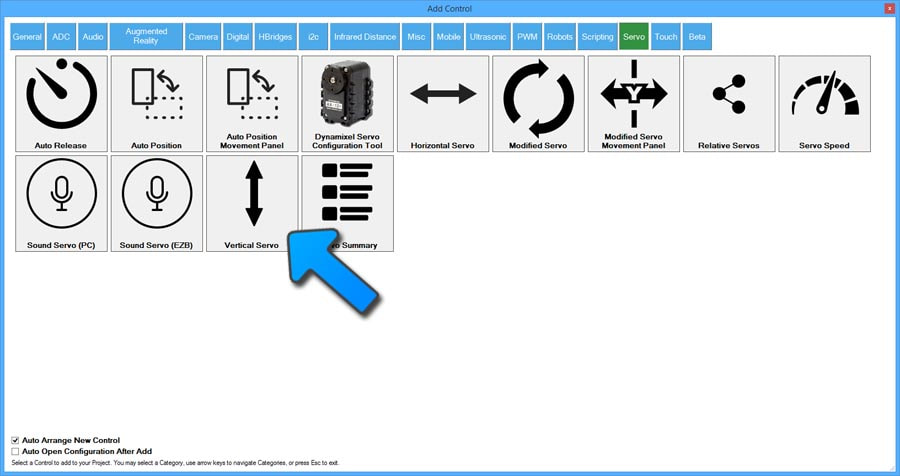
Step 5 The Vertical Servo control will be added to the workspace. 
Step 6 As mentioned in the Controls Tutorial, every control has Three Dots in the top right corner that will open a unique Settings/Configuration Dialog window. In EZ-Builder, the Settings/Configuration are represented by a Gear button. 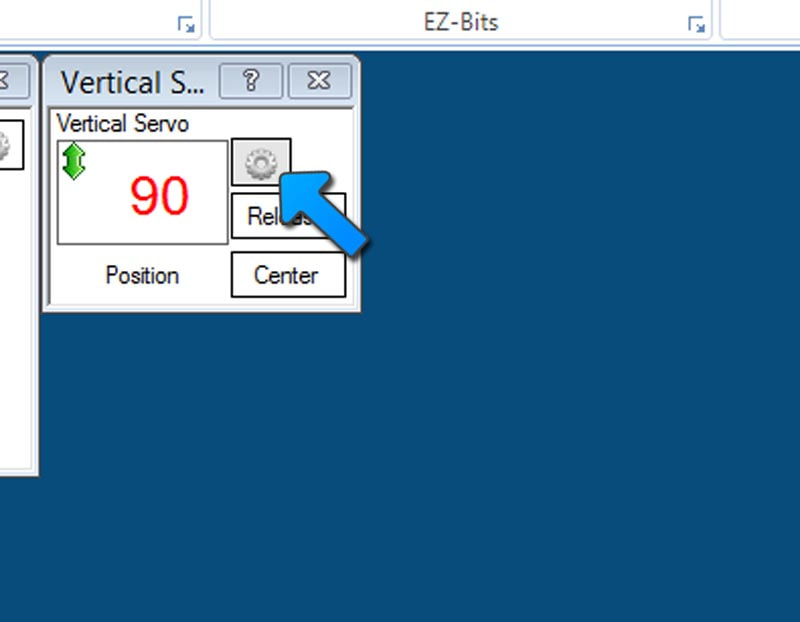
Step 7 Any Control that uses servos will have a similar configuration interface. Some controls may have 2 or more servo configuration interfaces (usually for horizontal and vertical servo control). In this control, there is only one servo interface. Name: This is the name of the Control. Board Index: There can be more than one EZ-B connected to the software at the same time. This specifies which EZ-B to send the servo command to. When you connected to the EZB, you connected to Board "0". "0" is the Board # that all Controls will default to. Port: This is the port on the EZB that your servo is plugged into. Remember that that top left port is D0, and not D1. Pressing the Port button will display the EZ-B for you to select the respective port. Min/Max: Allows you to set the minimum and maximum limits (in degrees) for the servo. The servo can move between 1 and 180 degrees. The value for Min must be less than the value of Max, in all cases, even when Invert is checked. Invert: If the servo is moving in the incorrect direction, checking this box will reverse/invert the direction of the servo. Multi Servo: If you want more than one servo to move in tandem, the Multi Servo feature allows you to specify multiple servos. 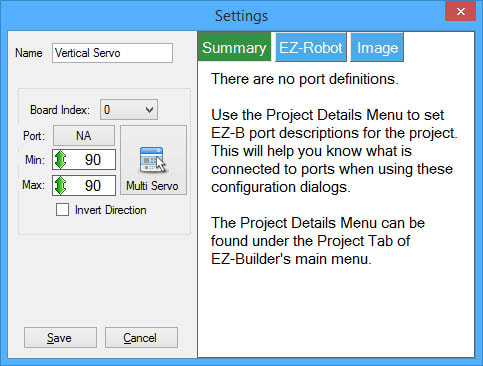
Step 8 The first step is to assign your Servo to a port. Press the PORT button and the EZ-B port configuration will be displayed. In this dialog, you may select the port and press the Close button. Make sure your servo is physically plugged into the specified port on the EZB controller 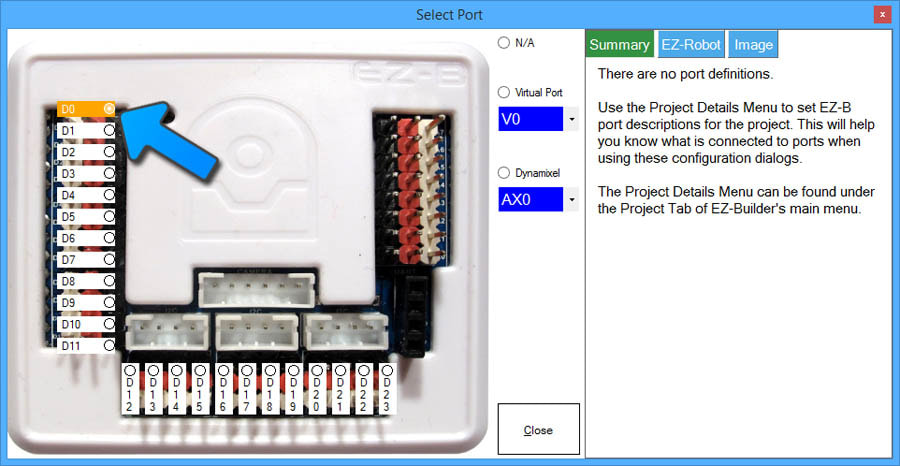
Step 9 Now that you have selected a port, we can move the servo to specify the MIN and MAX limits. These numbers are in degrees between 1 and 180. Start with the MIN by clicking and holding the mouse button while dragging the cursor UP or DOWN. The MIN value must be less than the MAX value. In this example, set the MIN to a low number and the servo will move in real-time if connected to the software and an EZ-B. 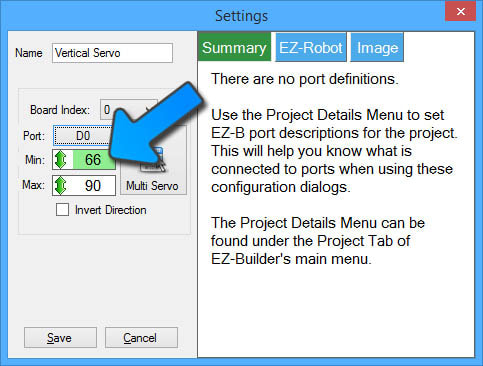
Step 10 Set the MAX value by clicking and holding the mouse button while dragging the cursor UP or DOWN. The MIN value must be less than the MAX value. In this example, set the MAX to a high number and the servo will move in real-time, if connected to the software and an EZ-B. *Note: In this example the servo will not move past 66 degrees on the low end or 130 degrees on the high end. This is very valuable if moving the servo beyond these values would cause your robot's parts to collide - for example, the humanoid robot's head colliding with the neck servo or a gripper closing too tight. 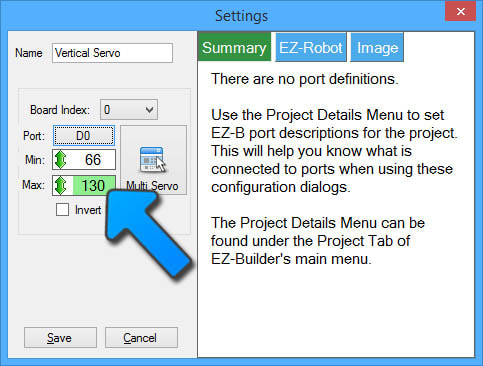
Step 11 If you would like this control to move more than one servo at the same time, the Multi Servo button does just that. Press the button to display the Multi Servo dialog. 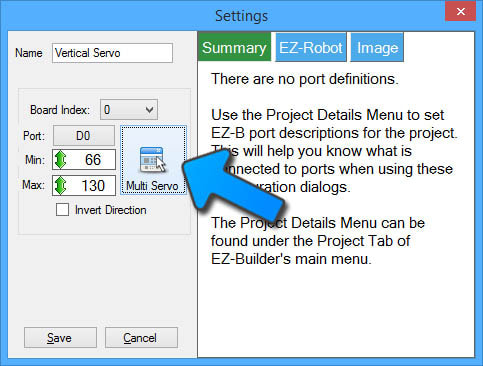
Step 12 Within the Multi Servo dialog window, press the ADD SERVO button. Each time it is pressed, a new servo entry is added. You can remove the servo by pressing the X on the respective servo. Use the PORT, MIN and MAX to configure the limits. The Multi Servo option also allows a ratio to be specified. The ratio is based off the primary value for the first servo in the list. If the servo degree position for the first servo is specified as 10 and the ratio is 2, the respective servo will move to degree position 20. 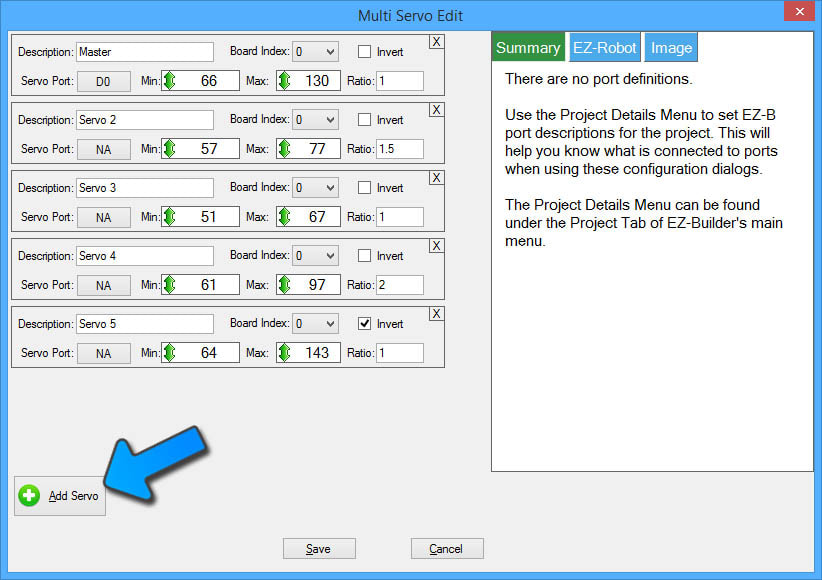
Step 13 Close the Configuration dialog for the Servo Control and return to the workspace. Now that the servo has been configured, you may move it between the MIN and MAX limits that were specified. Click in the servo position and slide the mouse up and down (for vertical control) to move the servo between the specified limits. *Note: Remember that even though many controls may move servos, the configuration of the servos are only valid within each specific control. This means if you configure a Camera Control to move servos to specific min/max ranges, those ranges are only applicable to the Camera Control. If you wish a servo or group of servos to move together from a script, use the Relative Servo Control. 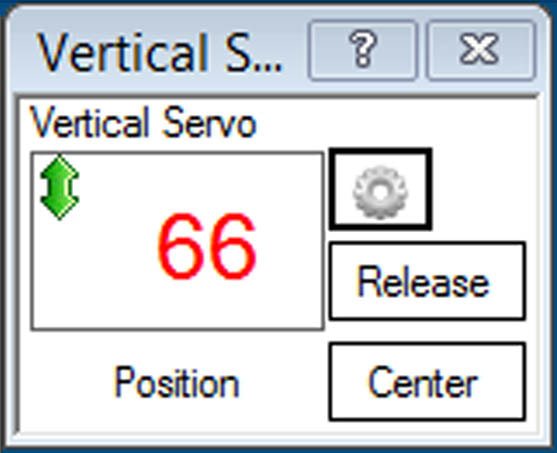
|