|
TABLE OF CONTENTS
Software 1. ARC for Windows PC 2. Example Projects 3. Controls 4. Getting Help with Controls 5. ControlCommand() 6. Virtual Desktops 7. RoboScratch 8. Blockly 9. EZ-Script Mobile Software 1. Create a Mobile App Linear Programming 1. Create a Scene Using RoboScratch (Big Hero Six) 2. Create a Scene using Blockly (Avengers) Logical Programming 1. Programming Concepts (Variables, If/Else, Logic) 2. Counting Up 3. Counting Down Camera Input 1. Introduction to the EZ-B Camera 2. Face Detection with RoboScratch 3. Face Detection with Blockly 4. Face Detection with EZ-Script 5. Color Tracking with Servos 6. Color Tracking with Movement 7. Detecting Multiple Colors 8. Line Following with Roli, AdventureBot and Shell-E 9. Vision - Object Training & Recognition 10. Glyphs to Control Robot Movement 11. Detecting Glyphs & Augmented Reality 12. QR Code Detect 13. Microsoft Cognitive Emotion 14. Microsoft Cognitive Vision Audio Input 1. Speech Recognition RGB Output 1. RGB Animations Positioning 1. Servo Control 2. Introduction to Servo Motors 3. Create a Robot Dance 4. Program Robot to Dab 5. Program Robot to Play Piano 6. MYO Gesture Armband Navigation and Movement 1. Movement Panels 2. Navigating using RoboScratch 3. Navigating using Blockly Creative Applications 1. Customize Your EZ-Robot 2. Control Robot From Twitter 3. Nest Thermostat EZ-B v4 Robot Brain 1. EZ-B v4 Robot Brain Overview 2. DIY Autonomous Robot Vehicle 3. EZ-B v4 and IoTiny Wi-Fi Modes 4. Change WiFi Name 5. Resetting Your EZ-B v4 or IoTiny 6. USB WiFi or Ethernet Adapter Robot Troubleshooting 1. Which Robot are You Using? |
ControlCommand()Within the ARC software (formerly EZ-Builder), it's important to understand what a Control is.
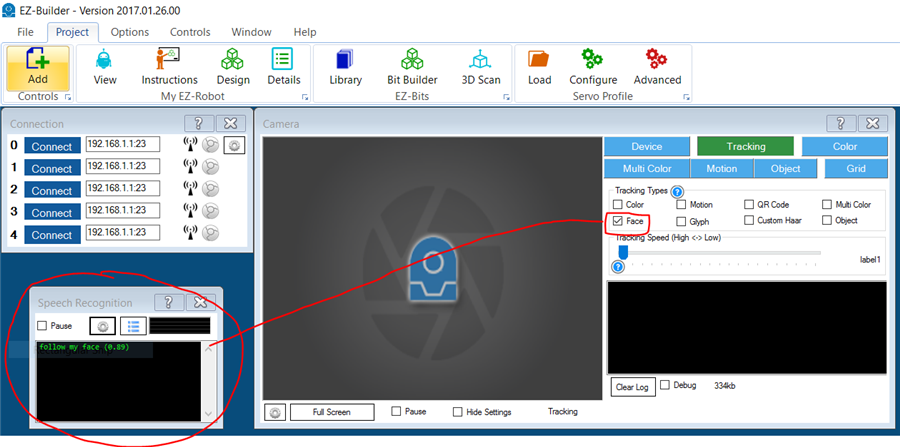
Within a Project's desktop, there are typically a number of windows, and each window is a Control. A Control is actually a little program that runs within the main program. For example, there are a large number of available Controls within ARC that you can add to your robot project. Each control is a behavior that gives your robot more ability. The most common Controls that you will see in the example projects are Connection, Camera and Auto Position. These controls are each separate programs that do something specific, such as processing video image data from the camera or moving servos in animations. Because each control is a separate program, ARC provides a mechanism for controls to talk to each other. This mechanism is the EZ-Script ControlCommand(). Using this command, an event or script within one Control can instruct another Control to do something. For example, if the Speech Recognition control detects the phrase "follow my face," the respective code may be instructed to inform the Camera control to enable Face Tracking. In The Code
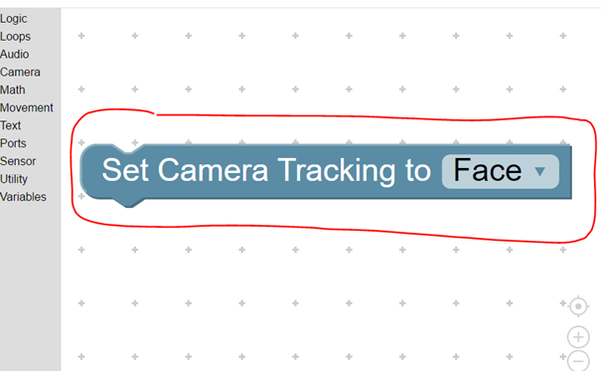
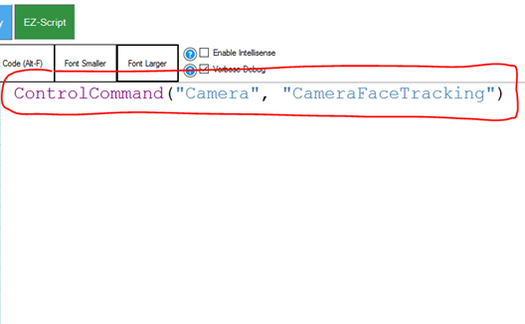
In the above example, the "follow my face" phrase within the Speech Recognition control instructed the Camera to begin Face Tracking. Let's take a look at the code within the Speech Recognition control that made this happen. Below, you will see the Blockly and respective EZ-Script that was assigned to the "follow my face" verbal command.
What Commands Are There?
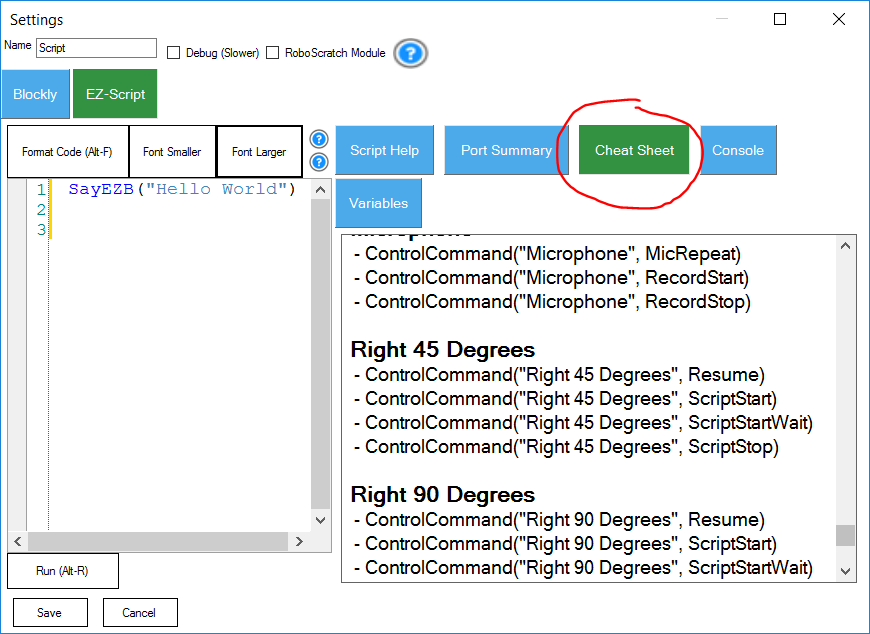
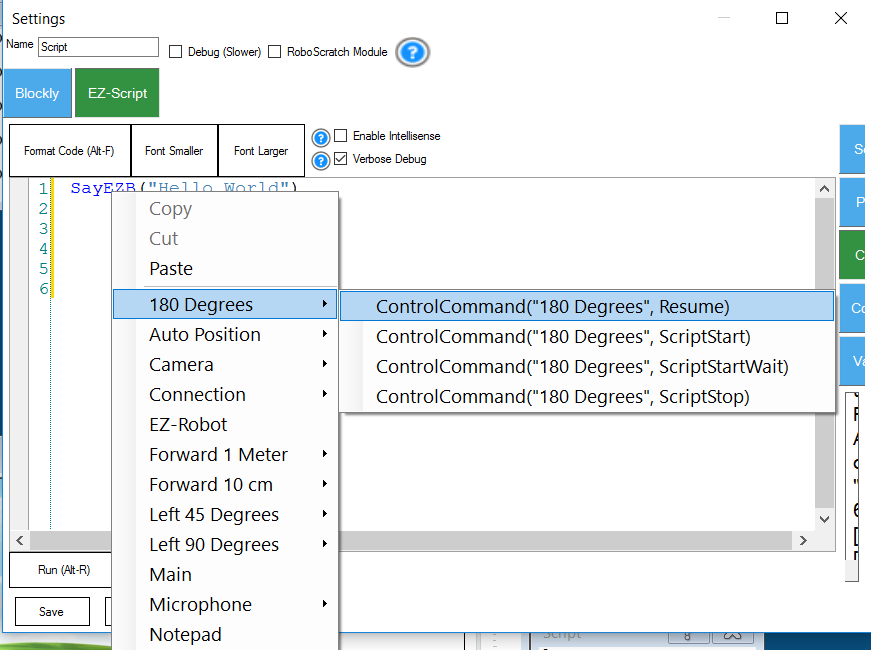
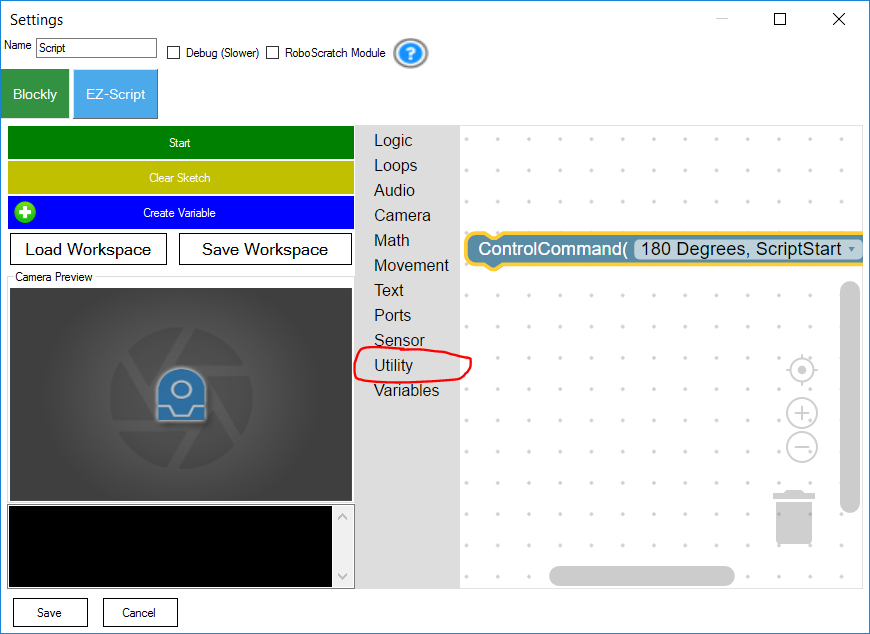
Each Control will accept a certain number of ControlCommand()s. Not all Controls accept the same commands. ARC will query each Control and ask "What control commands do you accept?" and create a list for you. The list is presented in three places. Here are screenshots of each location to find the available ControlCommands() for each Control within your project. How Does It Work?
Behind the scenes, ARC has a Control Manager, which knows of all the Controls within the project. The Control Manager knows each Control by its name. Controls are given a unique name by the Control Manager when added to a project. You may also edit the name of Controls within their Settings page. The ControlCommand() requires the name of the Control that it will be accessing as the first parameter. All other parameters are dependent on the Control as presented in the previous step (cheat sheet, right-click, Blockly). ControlCommmand() Never Waits
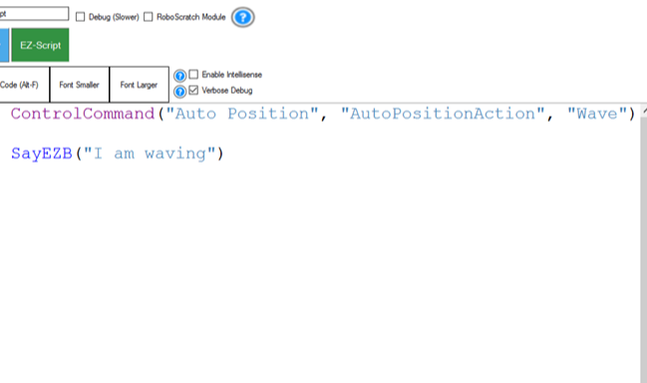
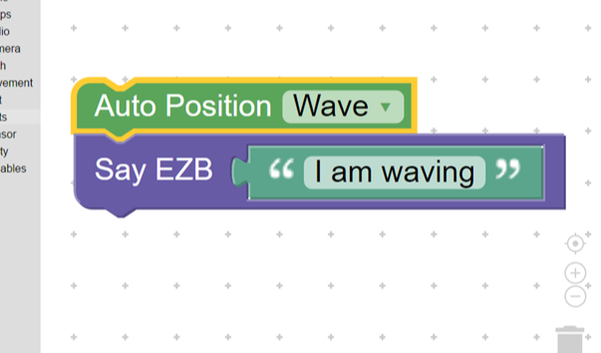
An important piece of information regarding ControlCommand() is that it does not wait until the destination control has completed executing the command. For example, imagine your script was instructing an Auto Position control to begin the action "Wave". The ControlCommand EZ-Script code may look like this... ControlCommand("Auto Position", "AutoPositionAction", "Wave") SayEZB("I am waving") The above code instructs the Auto Position to wave and then immediately say the phrase, "I am waving" out of the EZ-B's speaker. The script does not wait for the Wave action to complete before speaking the phrase. This is because the Auto Position Control is a separate program from the Audio Control.
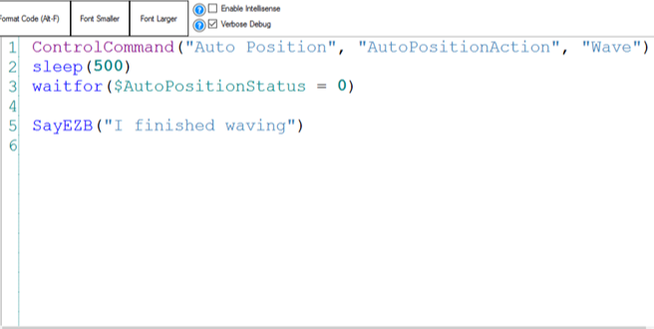
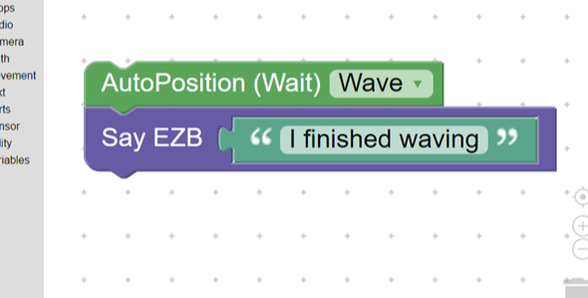
The script uses ControlCommand() to instruct the Auto Position to execute the Wave action and immediately moves on to the next line of code without waiting for the Auto Position Wave to complete. Communications through the ControlCommand() are one direction. They can only nudge another Control by saying "Hey, do this...." and do not receive a response. What If I Want To Wait? Typically, the ControlCommand() instructs another control to "do something" and does not wait for it to finish. The only exception to this rule is when the ControlCommand() parameter explicitly specifies that it will "Wait". An example would be a command like SayEZBWait, which would complete this specific line of script, before moving on. There are very few ControlCommands()'s that behave this way, and those that do will have "Wait" specified in the parameter name. In the previous example, if you wanted to wait until the Wave was completed prior to the robot saying something, it gets a little more complex - there isn't any Wait script command associated with the Auto Position Control. Here's how to make it happen: Some Controls will create a variable that contains the operation status of the Control (for example: $AutoPositionStatus). If the Control is active, then the variable will be set to TRUE or (1). If the Control is inactive, the variable will be set to FALSE (0). In the above scenario, we can tell if the Auto Position Action has completed by monitoring when the variable changes from a "1" to a "0". (See the sample script below) It is important to notice that not all controls provide a status variable. The controls that do provide a status variable will generally have the variable displayed in its Settings page. Otherwise, viewing all variables within the project can be done using the Variable Watcher. When programming in RoboScratch and Blockly, these languages include specific Blocks that have a "wait" function built into them. These Blocks will always have "(Wait)" in the title. Here is an example of EZ-Script and Blockly waiting for an Auto Position to complete before speaking a phrase. ControlCommand("Auto Position", "AutoPositionAction", "Wave") sleep(500) waitfor($AutoPositionStatus = 0) SayEZB("I finished waving") Examining the above code, one will notice the familiarity of the ControlCommand() instructing the Auto Position to execute the Wave action. However, the next two lines of code are new.
The Sleep(500) provides a short delay of 500 milliseconds, to give the Auto Position control enough time to begin executing the instruction. The following line WaitFor($AutoPositionStatus = 0) will wait forever until the specified condition is met. In this case, the specified condition is $AutoPositionStatus = 0, which means when the Auto Position Control is no longer active. This Waitfor() will wait until the Auto Position has completed because the Auto Position will set the $AutoPositionStatus value to FALSE (0) when it has. The last line of the script will speak after the Auto Position has completed. |

