|
TABLE OF CONTENTS
Software 1. ARC for Windows PC 2. Example Projects 3. Controls 4. Getting Help with Controls 5. ControlCommand() 6. Virtual Desktops 7. RoboScratch 8. Blockly 9. EZ-Script Mobile Software 1. Create a Mobile App Linear Programming 1. Create a Scene Using RoboScratch (Big Hero Six) 2. Create a Scene using Blockly (Avengers) Logical Programming 1. Programming Concepts (Variables, If/Else, Logic) 2. Counting Up 3. Counting Down Camera Input 1. Introduction to the EZ-B Camera 2. Face Detection with RoboScratch 3. Face Detection with Blockly 4. Face Detection with EZ-Script 5. Color Tracking with Servos 6. Color Tracking with Movement 7. Detecting Multiple Colors 8. Line Following with Roli, AdventureBot and Shell-E 9. Vision - Object Training & Recognition 10. Glyphs to Control Robot Movement 11. Detecting Glyphs & Augmented Reality 12. QR Code Detect 13. Microsoft Cognitive Emotion 14. Microsoft Cognitive Vision Audio Input 1. Speech Recognition RGB Output 1. RGB Animations Positioning 1. Servo Control 2. Introduction to Servo Motors 3. Create a Robot Dance 4. Program Robot to Dab 5. Program Robot to Play Piano 6. MYO Gesture Armband Navigation and Movement 1. Movement Panels 2. Navigating using RoboScratch 3. Navigating using Blockly Creative Applications 1. Customize Your EZ-Robot 2. Control Robot From Twitter 3. Nest Thermostat EZ-B v4 Robot Brain 1. EZ-B v4 Robot Brain Overview 2. DIY Autonomous Robot Vehicle 3. EZ-B v4 and IoTiny Wi-Fi Modes 4. Change WiFi Name 5. Resetting Your EZ-B v4 or IoTiny 6. USB WiFi or Ethernet Adapter Robot Troubleshooting 1. Which Robot are You Using? |
RoboScratch
Within the workspace, blocks can be easily re-arranged to change the order. It's an effective way to help young children understand the importance of sequencing.
Blocks include advanced functions such as, "Wait for Face", "Wait for Speech" and "Take Photo" Show Me RoboScratch
What Is RoboScratch?
RoboScratch teaches linear programming without the complexities of loops and conditions. It's a great interface for beginners to learn logical sequencing. Programming is similar to a food recipe - instructions need to be completed in order. The Workspace The workspace is where you create a Sequence, also called a Sketch. Common functions and methods are displayed as Element Blocks. The element blocks can be added to the workspace. Each element block includes attributes. The element blocks are connected with lines that show the execution path. Starting from the first element, the program will execute each consecutive element in order, and stop at the last element. You may recognize this approach as being similar to creating flow charts and process outlines. The RoboScratch approach provides very strong educational value in developing programmatic thinking. Element Blocks The elements blocks available in RoboScratch (camera tracking, actions, sound, etc.) are only available when the respective Controls have been added to your project. For example, if you load a project that does not have a Camera Control, RoboScratch will not display camera related Element Blocks. To add camera related elements, simply add and configure a Camera Control to the project. You can learn more about ARC Controls by clicking HERE. 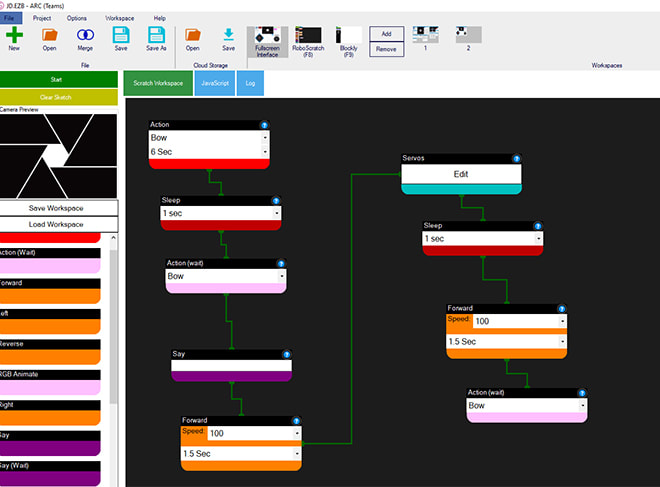
Revealing JavaScript Code
Similar to Blockly, RoboScratch offers users the ability to program a script sequence with the drag-and-drop Element Blocks and then reveal the JavaScript equivalent code. Think of RoboScratch as training wheels for programming! To make the magic happen, press the Javascript Tab above the Workspace. 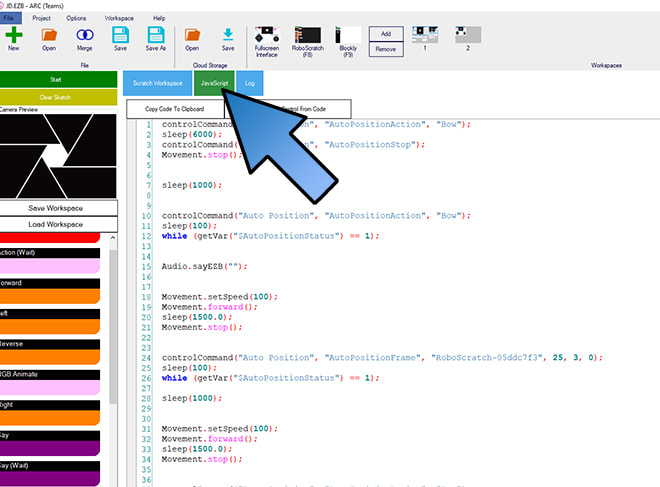
Step by Step Instructions
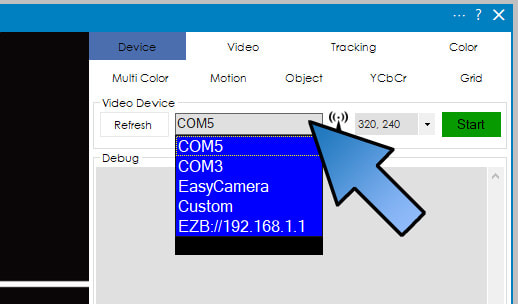
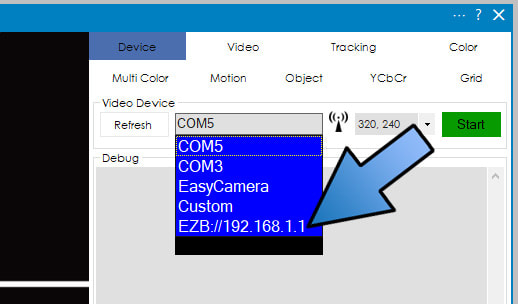
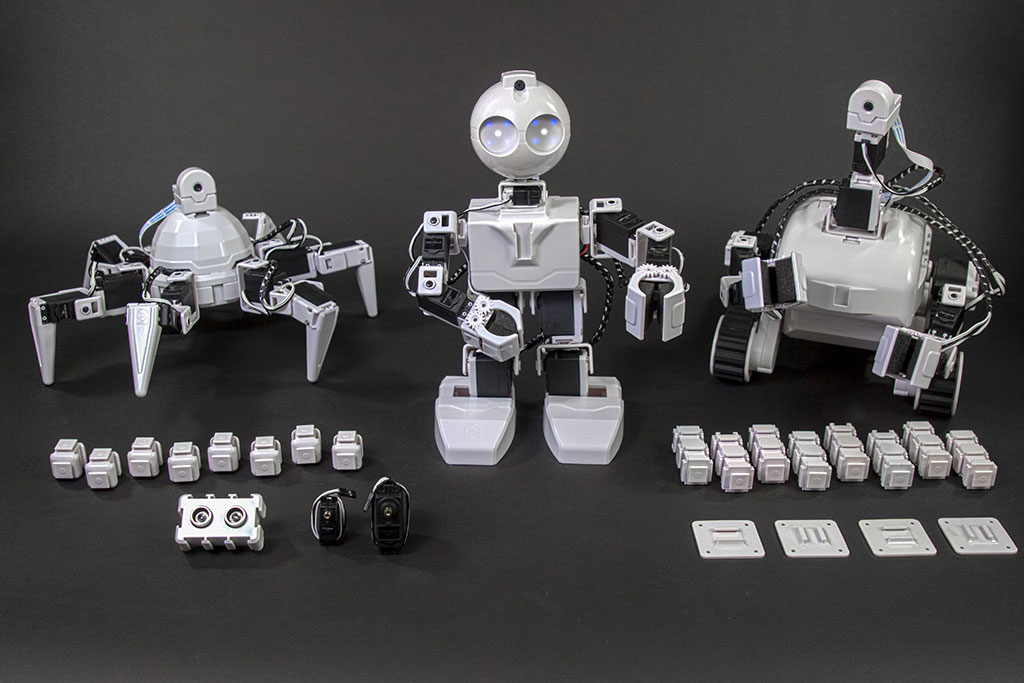
Step 1 Load the default example project for your robot from either the top menu's File->Open option, or the EZ-Cloud->Open. Remember, the default example project is named after your robot, which will be JD, Six, Roli, etc. This was covered in the tutorial while assembling your robot. Remember to load the Servo Profile for your robot. Step 2 Establish a connection to your robot. This was also covered in the assembly tutorials. Connect to the robot's WiFi network and press the Connect button in ARC's connection control. Once connected, press the Start button on the Camera Control to begin streaming the video. *Note: The Camera Control may default to the built-in camera on your computer. If your computer has a high-resolution camera, you may get a message telling you that you'll need to upgrade ARC to a paid subscription of the software. The camera in EZ-Robots will work with all levels of ARC (including the Free version). Simply click on the "Video Device" dropdown menu, and choose the EZB camera.
Step 3
Press the RoboScratch window button to load the RoboScratch designer view. 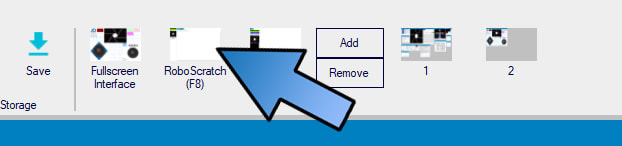
Step 4
We will start by demonstrating how to make the robot move forward for 3 seconds, stop and speak a phrase. Locate the Forward element block in the side menu, and click on the colored portion of the block. This will add the Forward block to the workspace. Keep the speed at 100, and enter a duration of 3.0 seconds. *Tip: If you add the wrong Element Block, you can delete it by right-clicking on the top black bar of that block within the workspace. 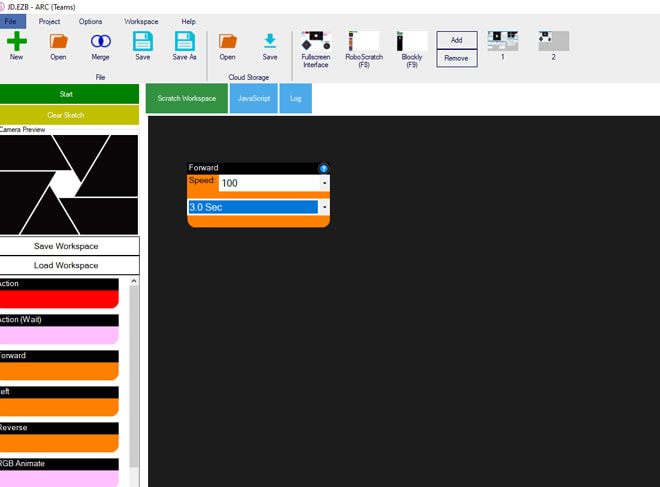
Step 5
Now we will make the robot speak. Locate the "Say(Wait)" element in the side menu, and click on the colored portion to add it to the workspace. For fun, add your own custom text into the field to have your robot speak your name! *Tip: The Element Blocks can be easily rearranged within the workspace by simply dragging them around. The software will automatically reconnect them in order. 
Step 6
Now press the START button in the top left and the robot will begin executing the command of each element. Notice how the RoboScratch elements will highlight in Yellow as they are being executed. 
Step 7 - View The Code The goal of RoboScratch is to teach you how to program. This is done by converting your RoboScratch elements into real code! The code can be viewed by pressing the JavaScript Tab 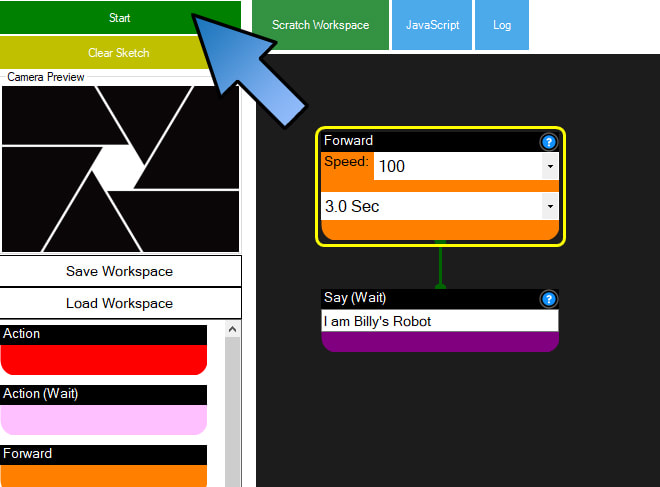
Finished!
You're now ready to program in RoboScratch! Start experimenting by adding Elements to create your own programs. Hover your mouse cursor over the blue question marks to find out what an element does. You can Save your RoboScratch Sketches by clicking on the Save Workspace in the side menu. |