|
TABLE OF CONTENTS
DIY Robotics Introduction
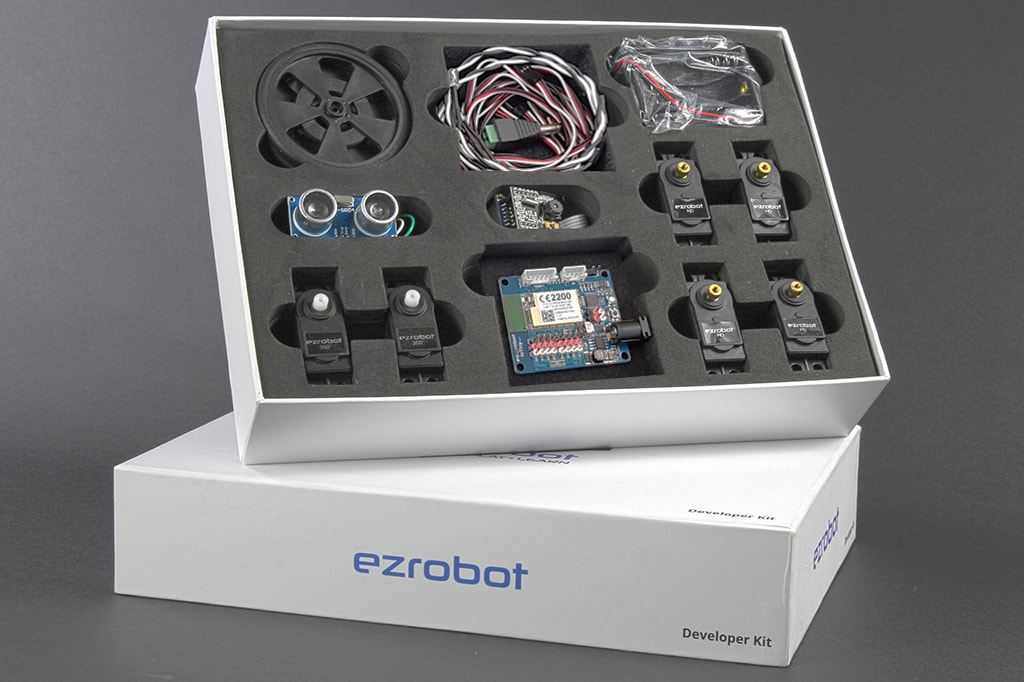
1. DIY Robotics Overview 2. Using The Robot Program 3. Introduction to Robotics 4. Developer Kit Box Contents 5. Battery Care & Charging 6. Powering Your EZ-B v4 or IoTiny 7. Using a USB Wi-Fi Dongle 8. Serial/USB Connectivity 9. EZ-B v4 & IoTiny Datasheet & Communication Protocol 10. WiFi Client Status on Digital Port 11. Firmware Upgrade 12. 360 HDD Servo Overview 3D Print Files 1. 3D Print Files for JD 2. 3D Print Files for Six 3. 3D Print Files for Roli 4. 3D Print Files for AdventureBot General CoursesSoftware 1. ARC for Windows PC 2. Example Projects 3. Controls 4. Getting Help with Controls 5. ControlCommand() 6. Virtual Desktops 7. RoboScratch 8. Blockly 9. EZ-Script Mobile Software 1. Create a Mobile App Linear Programming 1. Create a Scene Using RoboScratch (Big Hero Six) 2. Create a Scene using Blockly (Avengers) Logical Programming 1. Programming Concepts (Variables, If/Else, Logic) 2. Counting Up 3. Counting Down Camera Input 1. Introduction to the EZ-B Camera 2. Face Detection with RoboScratch 3. Face Detection with Blockly 4. Face Detection with EZ-Script 5. Color Tracking with Servos 6. Color Tracking with Movement 7. Detecting Multiple Colors 8. Line Following with Roli, AdventureBot and Shell-E 9. Vision - Object Training & Recognition 10. Glyphs to Control Robot Movement 11. Detecting Glyphs & Augmented Reality 12. QR Code Detect 13. Microsoft Cognitive Emotion 14. Microsoft Cognitive Vision Audio Input 1. Speech Recognition RGB Output 1. RGB Animations Positioning 1. Servo Control 2. Introduction to Servo Motors 3. Create a Robot Dance 4. Program Robot to Dab 5. Program Robot to Play Piano 6. MYO Gesture Armband Navigation and Movement 1. Movement Panels 2. Navigating using RoboScratch 3. Navigating using Blockly Creative Applications 1. Customize Your EZ-Robot 2. Control Robot From Twitter 3. Nest Thermostat EZ-B v4 Robot Brain 1. EZ-B v4 Robot Brain Overview 2. DIY Autonomous Robot Vehicle 3. EZ-B v4 and IoTiny Wi-Fi Modes 4. Change WiFi Name 5. Resetting Your EZ-B v4 or IoTiny 6. USB WiFi or Ethernet Adapter Robot Troubleshooting 1. Which Robot are You Using? |
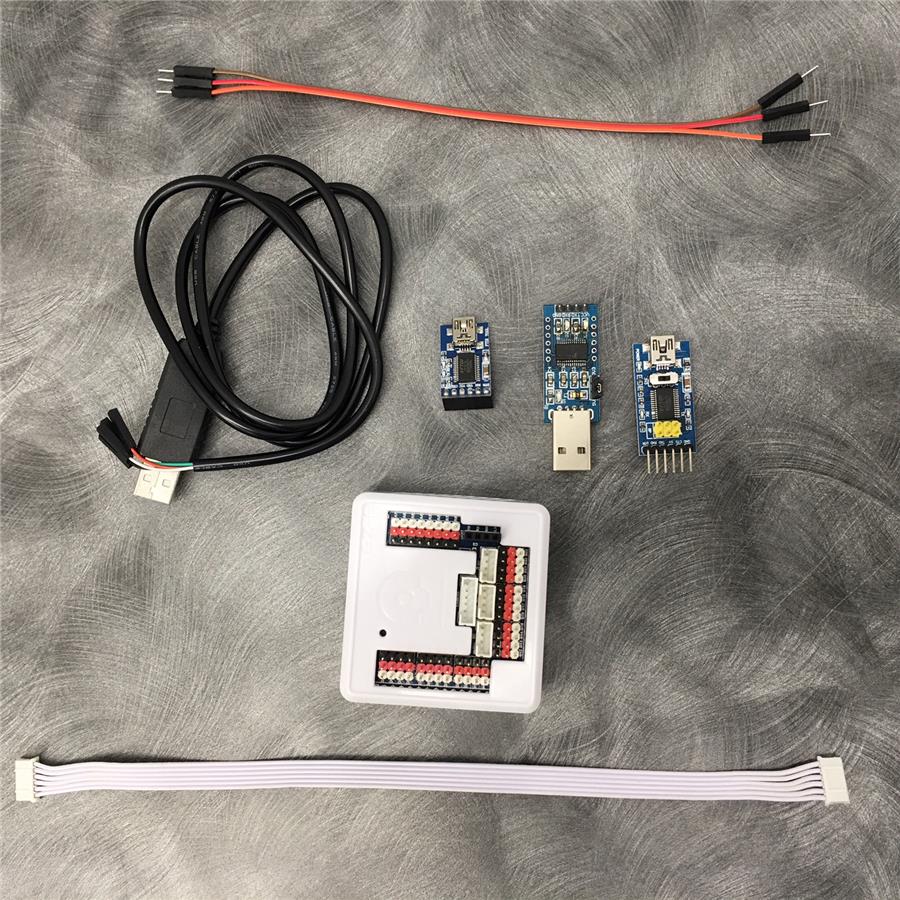
Serial/USB ConnectivityThe EZ-B v4 Smart Robot Controller and may be configured for direct wired connection to a PC. The connectivity uses the camera port of the EZ-B, which provides serial TX/RX data lines and GND. Connecting these 3 wires (tx/rx/gnd) to a USB/Serial adapter will allow ARC (formerly EZ-Builder) a direct connection to the EZ-B.
Please note this configuration is NOT possible to use with the IoTiny. What You Will Need
Upgrade To Lastest Firmware
This feature may require a firmware upgrade for the EZ-B v4. Load the respective firmware update utility that is installed with ARC from the Microsoft Windows Start Menu. 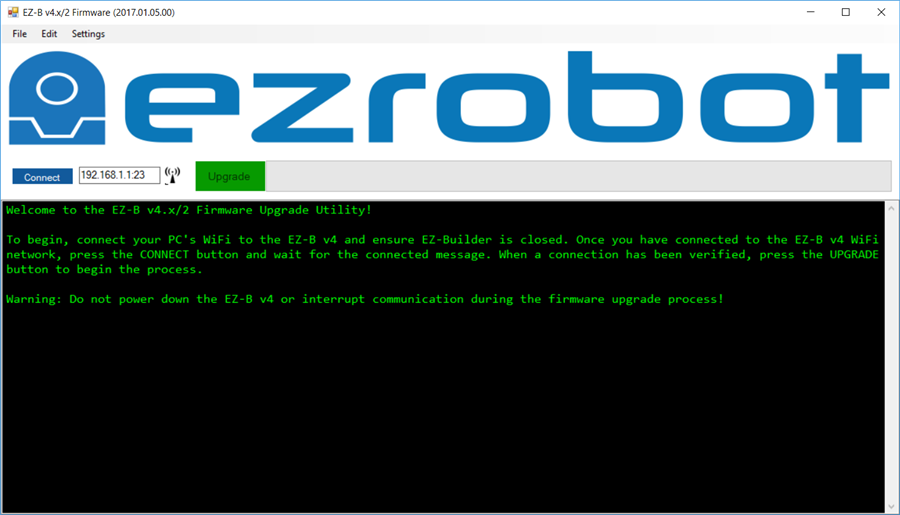
Connect the USB-TTL adapter to the EZ-B v4 (Wiring Diagram)
Using the Jumper Cable Kit and EZ-B v4 Camera Cable (25cm) connect the USB-TTL adapter to the EZ-B v4 following the wiring diagram above. You only need 3 wires to make the connection: EZ-B TX to USB-TTL adapter RX EZ-B RX to USB-TTL adapter TX EZ-B GND to USB-TTL adapter GND If you'd like to create your own cable to make the connection to the EZ-B v4 camera port you will need a 6-pin JST-PH connector (2mm pitch) and the corresponding pins. 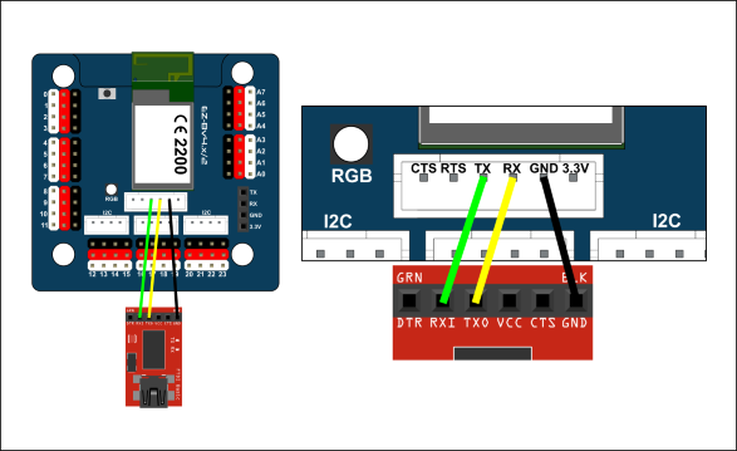
Configure EZ-B via Web Admin
Connect to your EZ-B's WiFi and visit the web server (default is http://192.168.1.1). Select the ADVANCED tab and change the baud rate to the highest speed setting if supported by your USB Serial Adapter. Otherwise, select any of the lower speeds. Press SAVE and the EZ-B will reboot. The EZ-B will now no longer accept connections via WiFi other than services such as HTTP and Telnet. To restore WiFi connections to ARC, either log into the web interface and DISABLE the serial connectivity or press the reset button on the EZ-B. The EZ-B camera will no longer function when the Serial connectivity is enabled. 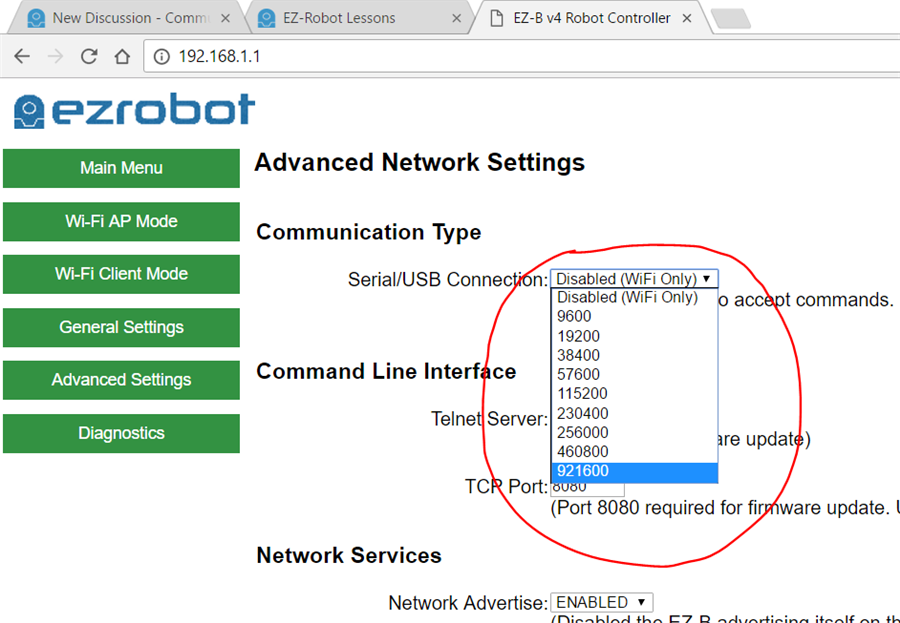
Configure ARC for Baud Rate
Configure the Connection Control settings to the specified baud rate to match that configured in the EZ-B web interface. 
Connecting To EZ-B from ARC
You will no longer require the WiFi connectivity for the EZ-B, which means the connection occurs over the USB serial cable. Once the USB Serial Adapter is inserted into the computer, load ARC. The Connection Control will display detected COM ports when the address is LEFT Clicked with the mouse. Select the COM port and connect as you normally would with WiFi. The connection status will not make a connect or disconnect chime as with the WiFi. 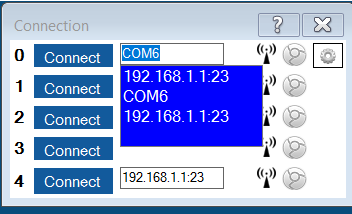
|