|
TABLE OF CONTENTS
Roli Introduction and Setup
1. Getting Started with Roli 2. Using The Robot Program 3. Introduction to Robotics 4. Roli Box Contents 5. Battery Care & Charging 6. Building Roli Rover 7. Connecting Roli's Motors (H-Bridge) 8. Connecting to Roli over WiFi 9. Using a USB Wi-Fi Dongle 10. Making Roli Move 11. Care for Roli 3D Printing for Roli 1. 3D Print Files for Roli General CoursesSoftware 1. ARC for Windows PC 2. Example Projects 3. Controls 4. Getting Help with Controls 5. ControlCommand() 6. Virtual Desktops 7. RoboScratch 8. Blockly 9. EZ-Script Mobile Software 1. Create a Mobile App Linear Programming 1. Create a Scene Using RoboScratch (Big Hero Six) 2. Create a Scene using Blockly (Avengers) Logical Programming 1. Programming Concepts (Variables, If/Else, Logic) 2. Counting Up 3. Counting Down Camera Input 1. Introduction to the EZ-B Camera 2. Face Detection with RoboScratch 3. Face Detection with Blockly 4. Face Detection with EZ-Script 5. Color Tracking with Servos 6. Color Tracking with Movement 7. Detecting Multiple Colors 8. Line Following with Roli, AdventureBot and Shell-E 9. Vision - Object Training & Recognition 10. Glyphs to Control Robot Movement 11. Detecting Glyphs & Augmented Reality 12. QR Code Detect 13. Microsoft Cognitive Emotion 14. Microsoft Cognitive Vision Audio Input 1. Speech Recognition RGB Output 1. RGB Animations Positioning 1. Servo Control 2. Introduction to Servo Motors 3. Create a Robot Dance 4. Program Robot to Dab 5. Program Robot to Play Piano 6. MYO Gesture Armband Navigation and Movement 1. Movement Panels 2. Navigating using RoboScratch 3. Navigating using Blockly Creative Applications 1. Customize Your EZ-Robot 2. Control Robot From Twitter 3. Nest Thermostat EZ-B v4 Robot Brain 1. EZ-B v4 Robot Brain Overview 2. DIY Autonomous Robot Vehicle 3. EZ-B v4 and IoTiny Wi-Fi Modes 4. Change WiFi Name 5. Resetting Your EZ-B v4 or IoTiny 6. USB WiFi or Ethernet Adapter Robot Troubleshooting 1. Which Robot are You Using? |
Connecting to Roli over WiFiIntroduction
In this lesson, we will explain how to connect to your Roli robot using your PC. You will load ARC (formerly EZ-Builder) and connect to Roli over Wi-Fi. Lay Roli on his back on a flat surface for this lesson. What You Will Need
Step 1 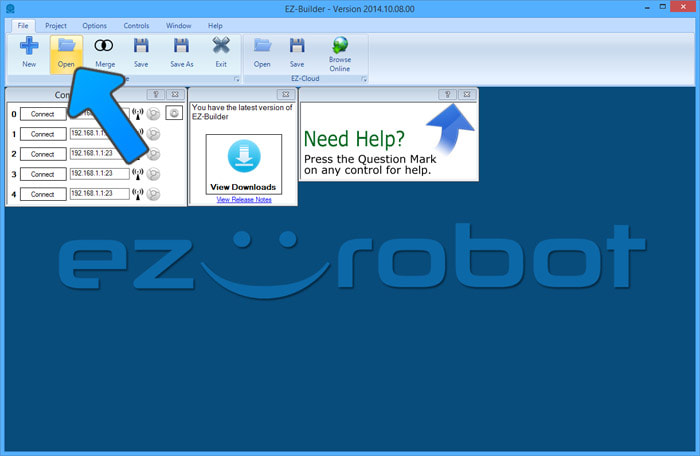
Load ARC and press the OPEN button under the FILE menu.
*Note: ARC is regularly updated. To access the latest features and capabilities, keep ARC updated. Within an education setting, you may want to only update ARC between semesters. Step 2 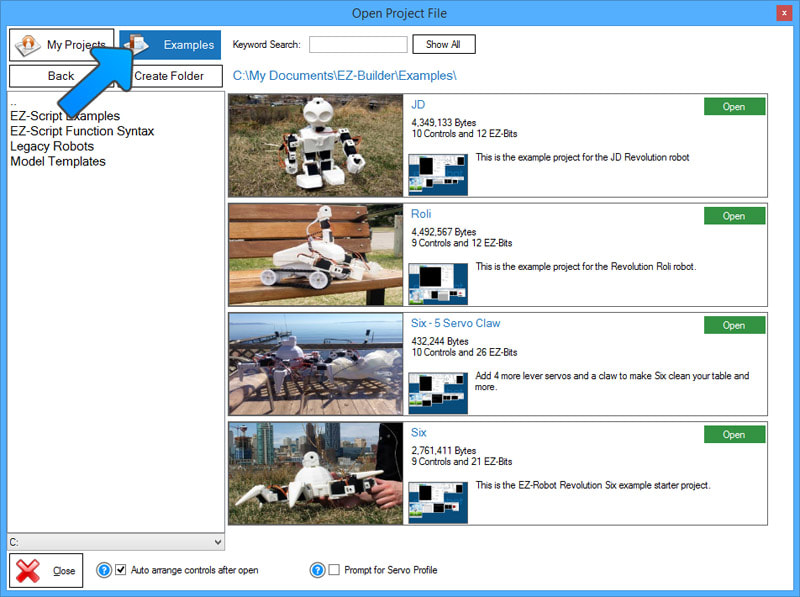
In ARC, the open file dialog window will display. Press the Examples button in the top left to open the example robots.
Step 3 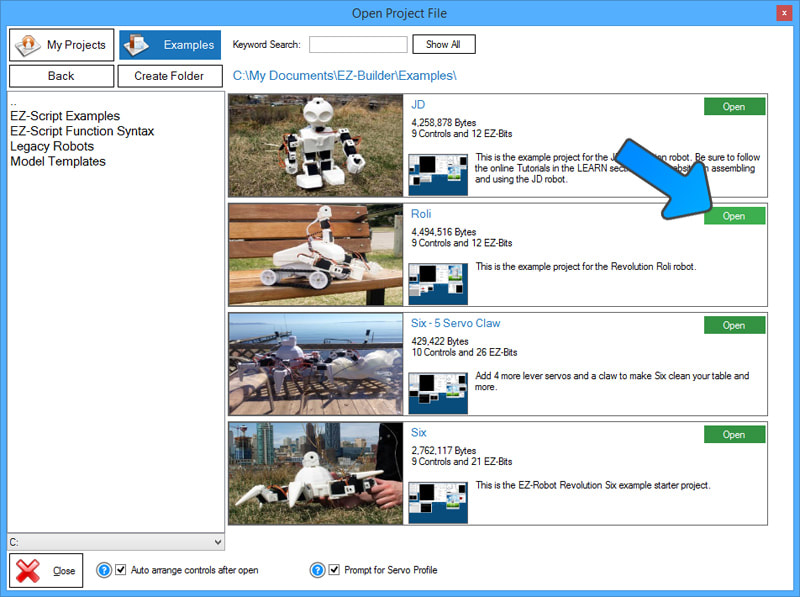
Locate the Roli project and press the OPEN button.
Step 4 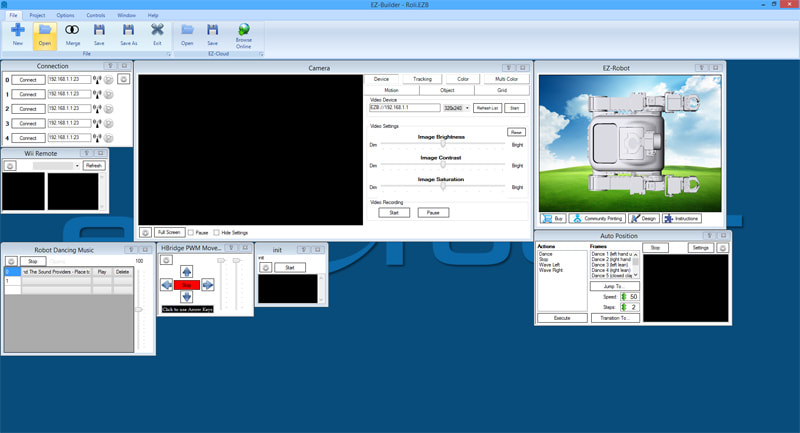
Your Roli project is now loaded.
*Note: If you receive warning messages about missing EZ-Bits or an unfamiliar "Open Assembly Instructions" dialog, then you must not have completed the prerequisites mentioned earlier. Please complete the lessons recommended above in the prerequisites section before continuing. Step 5 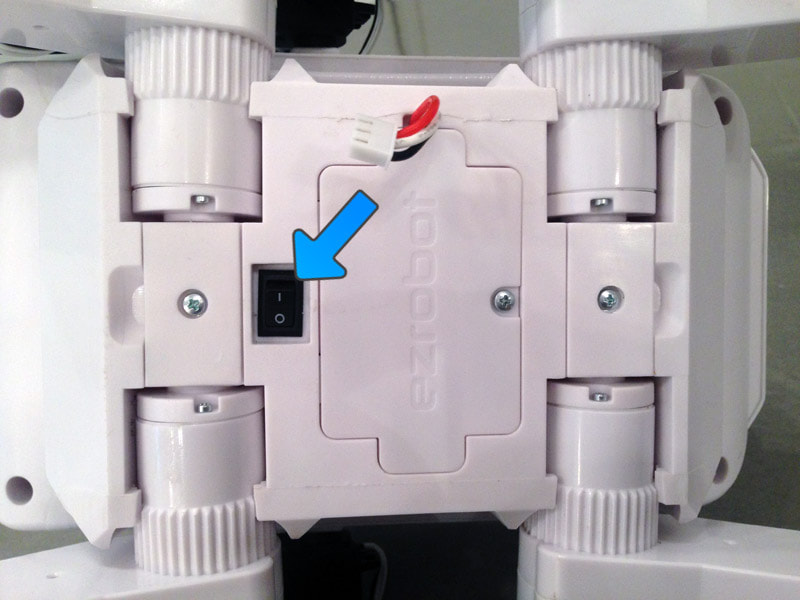
Turn Roli's power switch to the ON or 1 position. Early Revolution robots have a power switch labelled ON/OFF, while the newer robots are labelled with a 0/1.
*Note: Roli's servos will jolt/twitch when the power is turned on. This is normal behavior as the servos will move when initialized with power. Step 6 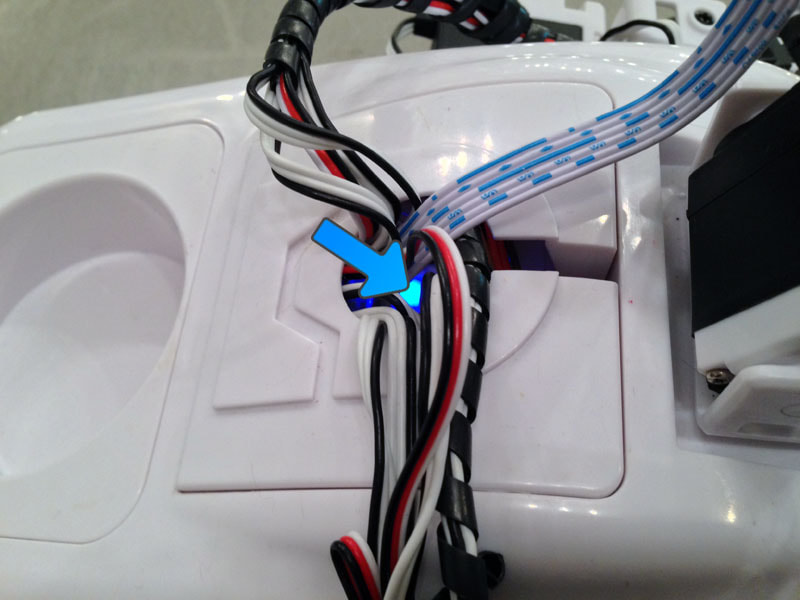
When the power switch is turned to the ON position, the EZ-B will be flashing Blue. This means it is ready for a Wi-Fi connection.
Step 7 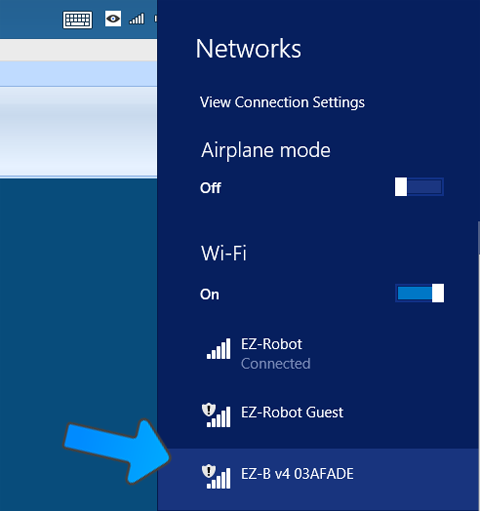
Locate Roli's EZ-B Wi-Fi Access Point in your Wi-Fi Networks List. This is found by pressing the Wi-Fi button on your system tray in Windows. The EZ-B WiFi Access Point will always start with EZ-B v4 and can be renamed at a later point.
Step 8 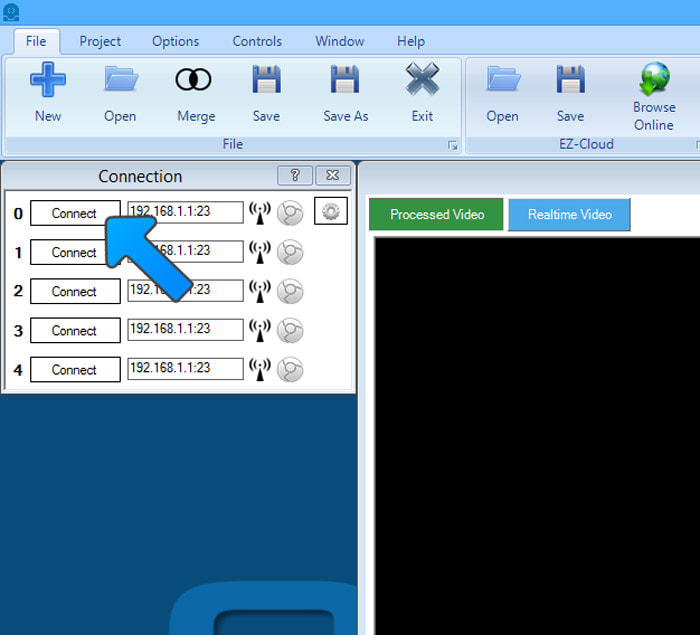
Press the CONNECT button and a connection will occur from the PC to the EZ-B v4 in Roli. His servos will instantly initialize into the calibration position.
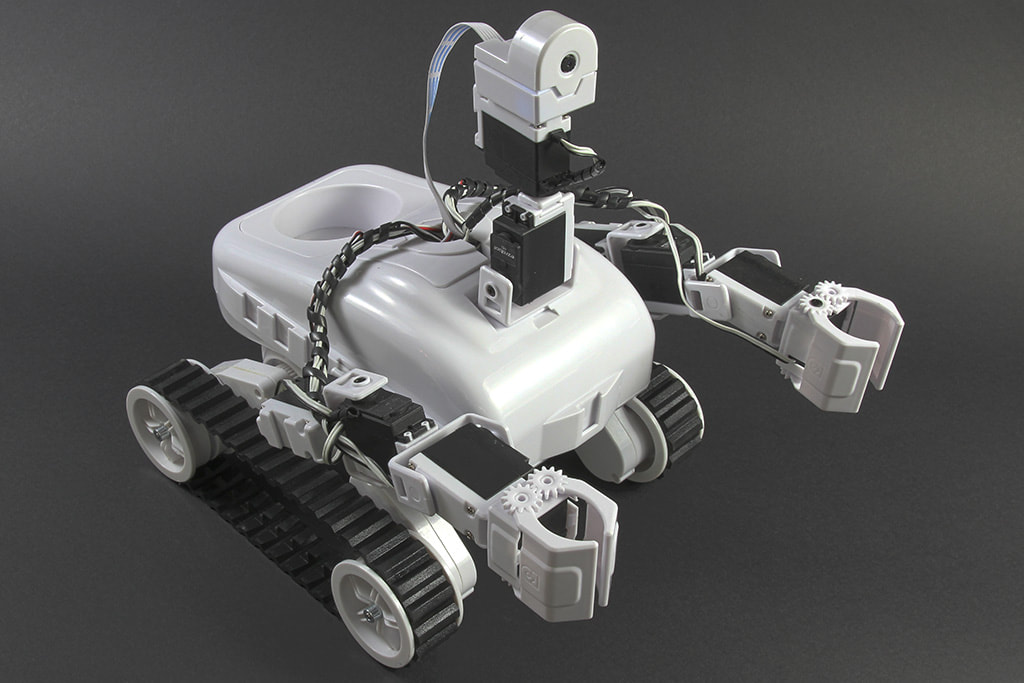
*Note: If your EZ-Robot is older and has HD Servos, it is normal for the servos to make buzzing noises until your robot is calibrated. The EZ-Robot HD Servos are Heavy Duty with metal gears, which is how our robots are able to stand, walk and dance. Due to the strength of our servos, they can be a little noisy when they are under load. It is normal for robots to have noisy joints while holding positions under their own weight, just like in the movies. Once the servo motors are properly calibrated, they should remain silent when the robot is in standing position. *Note: EZ-Robot's more recent HDD servo motors will not make a noise while holding weight, but should still be calibrated to reduce load and heat, and to prolong servo life. Once connected, Roli will jump into the initialization position. The initialize position has Roli's arms fight go straight out forward, before moving upwards into a resting position. The head with the camera should be straight up.
If the joints of Roli do not initialize to the correct position demonstrated in the above image, shut down the robot and skip to the Calibration Procedure in troubleshooting before operating Roli. Complete Advance to the next lesson - we're close to having Roli doing awesome stuff! |