GETTING STARTED
EZ-Robots use ARC software. This guide will help you install and set up ARC on your PC. It will cover everything you need to get started with EZ-Robots.
The ‘Start Here’ guide that is included in every box is also an extremely useful reference tool. Please note that ARC currently only runs on Windows. To use ARC on a Mac, you'll need to install a virtual machine (like VMWare or Parallels) first. You can find the guide on how to do this on our Software - MAC page.
At the bottom of the page is also a detailed list of practices that we recommend. These practices will help to ensure that your robots work the way they're supposed to, and quickly find any issues that you may have.
PC Installation
Part 1: Download and Install
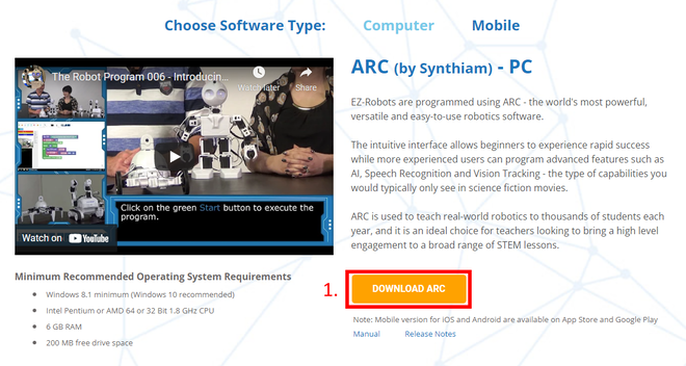
Go to www.ez-robot.com/software.html to download the latest version. Click on the button labelled "DOWNLOAD ARC".
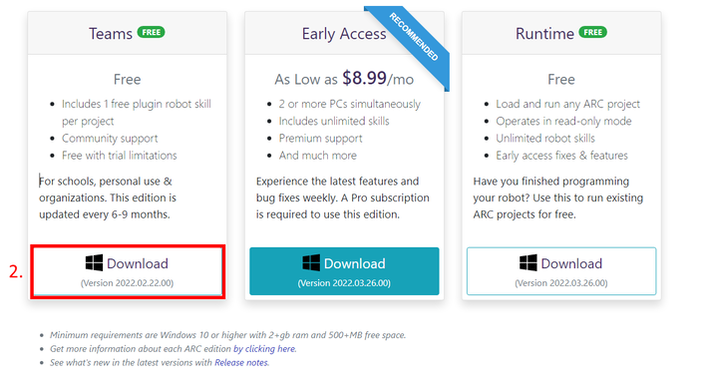
ARC has a free version for educational and personal use, called "Teams" and a fully unlocked version called "Early Access".
Both versions allow users to program powerful robots with advanced features, however the Teams version has some limitations on the number of robot skills that can be performed at one time in a single project. View the ARC Download page for more information about the specific features to determine which version is right for you.
Select the version you want and click on it to begin the download.
Find and run the download. Click on the following buttons:
- Agree to License Terms and Conditions checkbox
- Install
- Yes for User Account Control (if necessary)
- Once it's installed click Run
Your computer may ask to install necessary C++ or C# .net structure code. This is normal, and you should allow it to install because often the software will automatically go and find the necessary files. If you have any issues, please contact Synthiam Support.
Now you have properly installed ARC. However, there are a few more things to do before we can be fully set up.
Now you have properly installed ARC. However, there are a few more things to do before we can be fully set up.
Step 2: Setting up ARC
|
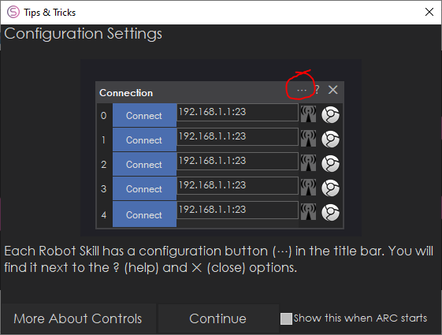
When you first open ARC, a popup will appear detailing the Settings button.
This button is used to program the robot. Read the popup and click Continue. Note: In the Learn section of the website at the top right, you will find a large number of video tutorials; however, these are on the EZ-Builder software. ARC is the final development of EZ-Builder, and so while it may look very different, the underlying function is the exact same. The largest difference is that the 'settings button' in EZ-Builder is a gear icon button somewhere on each control. This has been simplified in ARC to be the ... at the top right of every window. So if the tutorial tells you to click on the settings button, just find the correct window and click on the ... at the top right. |
|
|
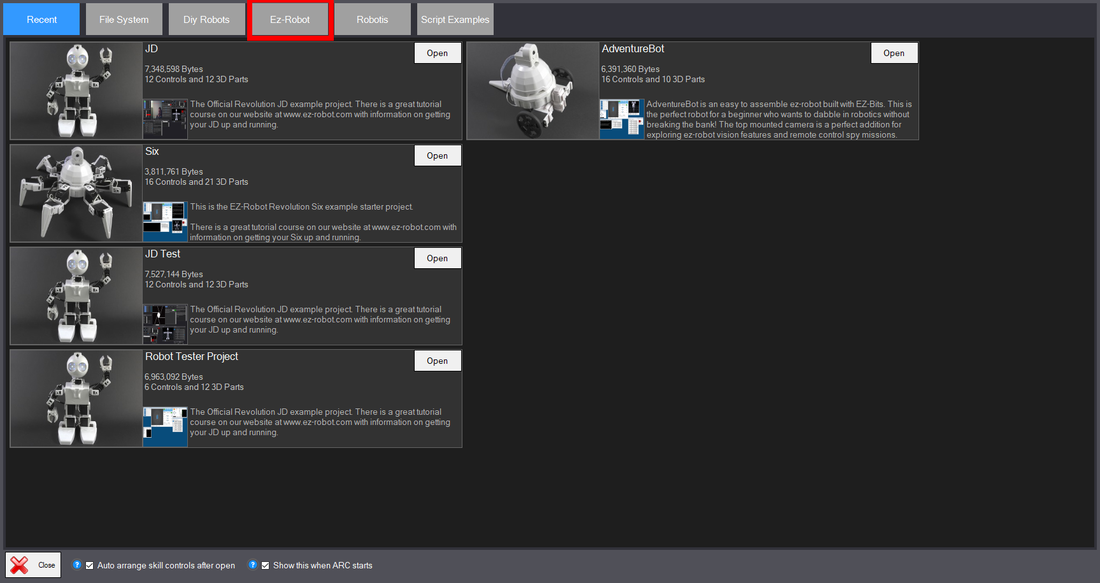
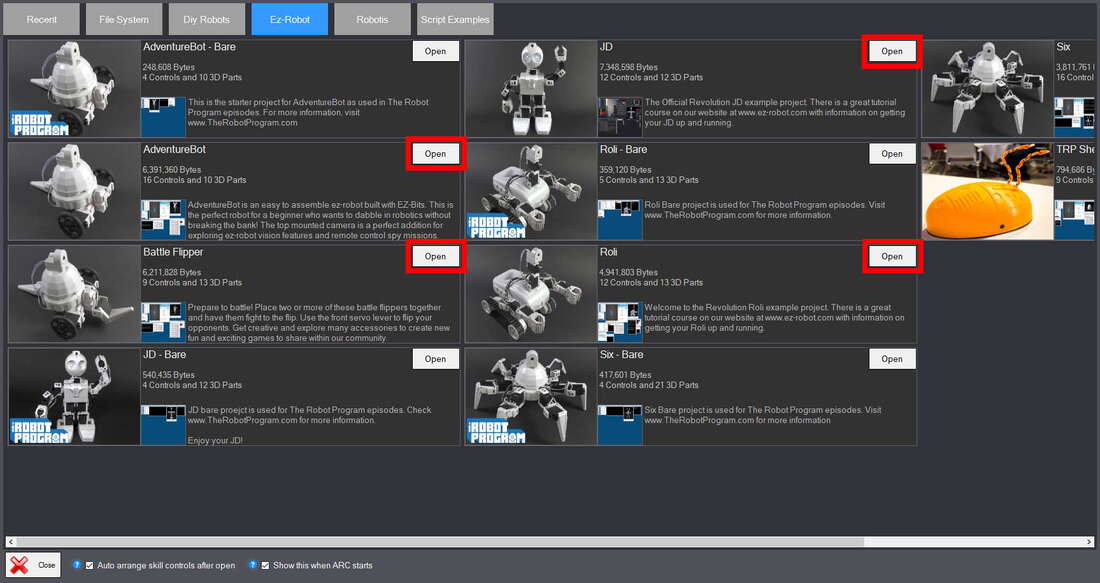
The Projects window may automatically open. If it does not, at the top left beside New, click on Open.
Click on the EZ-Robot category at the top. |
|
|
Click on the 'Open' button beside the project that corresponds to your robot.
Projects that have 'Bare' in the title are designed for educational use in a scenario where you want students to begin with a robot with limited functionality, allowing them to program custom capabilities into their own robots. The Hexapod project is further to the right, and you can use the scroll bar at the bottom to see it. |
|
|
*At this point, ARC may ask you to log into Synthiam to sync EZ-Bit files. You can quickly create your own account by clicking on the appropriate button. Accounts can be shared between multiple installations of ARC, so if you want to have a single account for your classroom/company/family, simply create one and log into it as necessary.
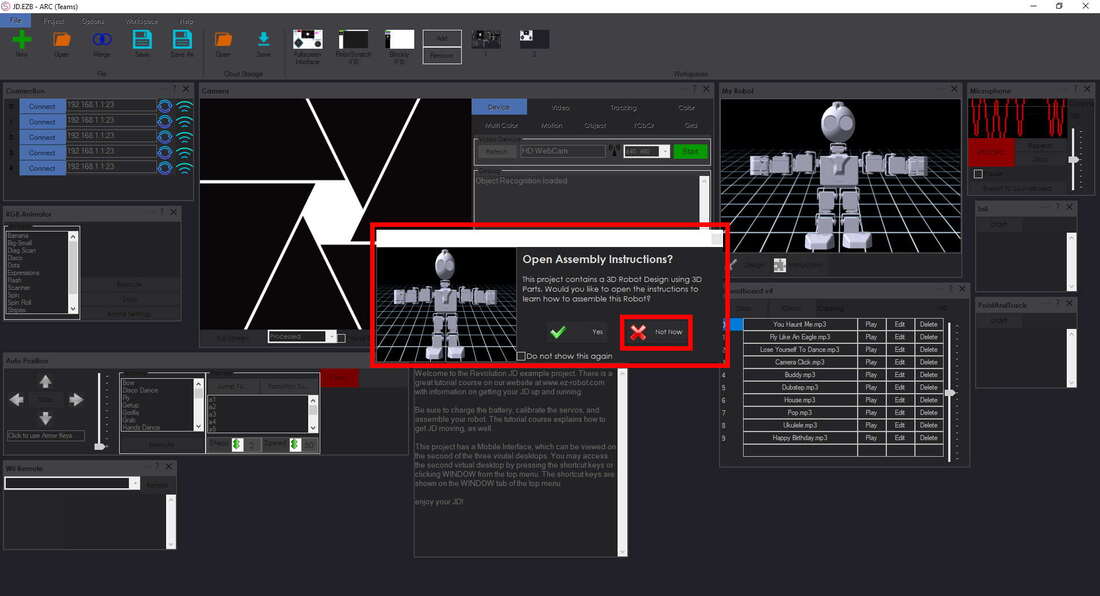
ARC may ask whether you want to sync EZ-Bit files. If it does, click on Sync. Wait for it to finish, then click Close. ARC may ask whether you want to open the Assembly Instructions. Click on "Not Now". These instructions are useful to those who have already assembled a robot before but we would recommend new users view the linked tutorials for more detailed instructions and a video on how to build your robot. Tutorial - Building JD (Humanoid) Tutorial - Building Six (Hexapod) Tutorial - Building Roli (Rover) Tutorial - Building an Adventurebot / Battle Flipper |
|
|
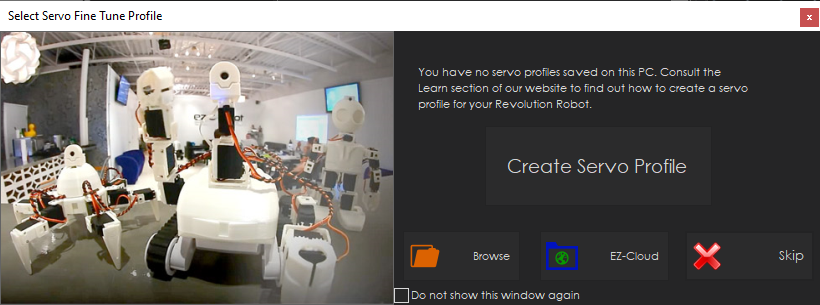
If you are using a Humanoid robot, the software may prompt you to create a servo fine-tune profile.
Click on "Skip" for now. Finally, if you will be using the JD Humanoid robot in an educational setting, and want a robust project that you can use to inspire your students, please download the JD Presentation Project here. It should be copied into the following folder: Documents/ARC/My Projects |
|
Done!
Your software is now ready to be used. Please view the other tutorials to learn how to program and care for your specific EZ-Robot.
Once you've selected your robot within the Robotics Lessons section, some important ones are:
Battery Care & Charging
Care for JD/Hex/Rover
Your software is now ready to be used. Please view the other tutorials to learn how to program and care for your specific EZ-Robot.
Once you've selected your robot within the Robotics Lessons section, some important ones are:
Battery Care & Charging
Care for JD/Hex/Rover