How to Install and Set Up ARC for EZ-Robots
This page will detail how to install and set up ARC on your PC. It will cover everything you need to get started with EZ-Robots. The ‘Start Here’ guide that is included in every box is also an extremely useful reference tool. Please note that ARC currently only works on Windows. To use ARC on a Mac, you'll need to install a virtual machine (like VMWare or Parallels) first. You can find the instructions for this on our Software - MAC page.
At the bottom of the page is also a detailed list of practices that we recommend. These practices will help to ensure that your robots work the way they're supposed to, and quickly find any issues that you may have.
At the bottom of the page is also a detailed list of practices that we recommend. These practices will help to ensure that your robots work the way they're supposed to, and quickly find any issues that you may have.
PC Installation
Part 1: Download and Install
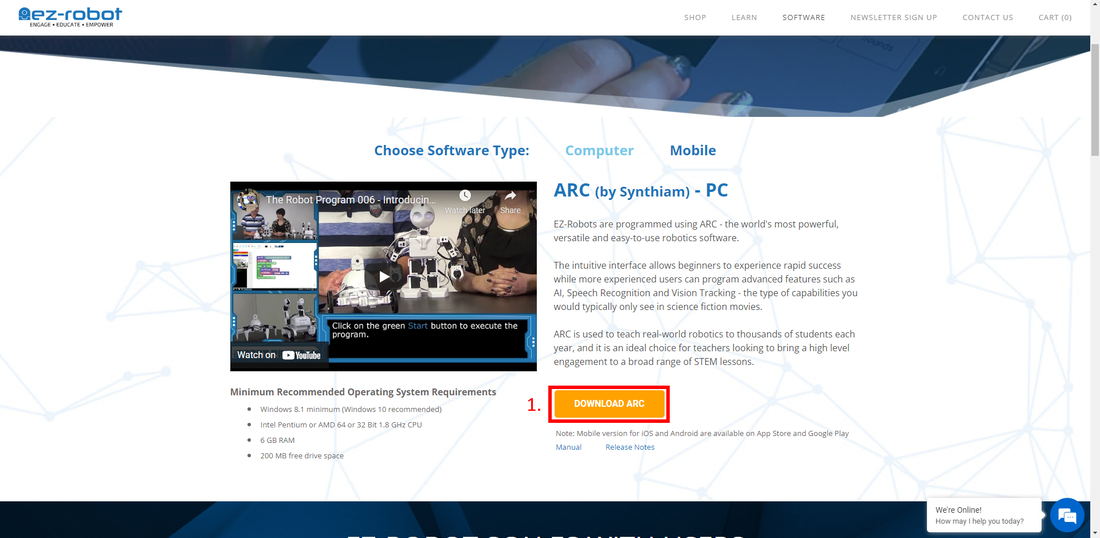
Go to www.ez-robot.com/software.html to download the latest version. Click on the button labelled "DOWNLOAD ARC".
Find the Download button beside ARC (Teams) and click on it to begin the download.

Find and run the download. Click on the following buttons:
- Agree to License Terms and Conditions checkbox
- Install
- Yes for User Account Control (if necessary)
- Once it's installed click Run
Your computer may ask to install necessary C++ or C# .net structure code. This is normal, and you should allow it to install because often the software will automatically go and find the necessary files. If you have any issues, please contact Synthiam Support.
Now you have properly installed ARC. However, there are a few more things to do before we can be fully set up.
Now you have properly installed ARC. However, there are a few more things to do before we can be fully set up.
Step 2: Setting up ARC
|
When you first open ARC, a popup will appear detailing the Settings button.
This button is used to program the robot. Read the popup and click Continue. |

|
|
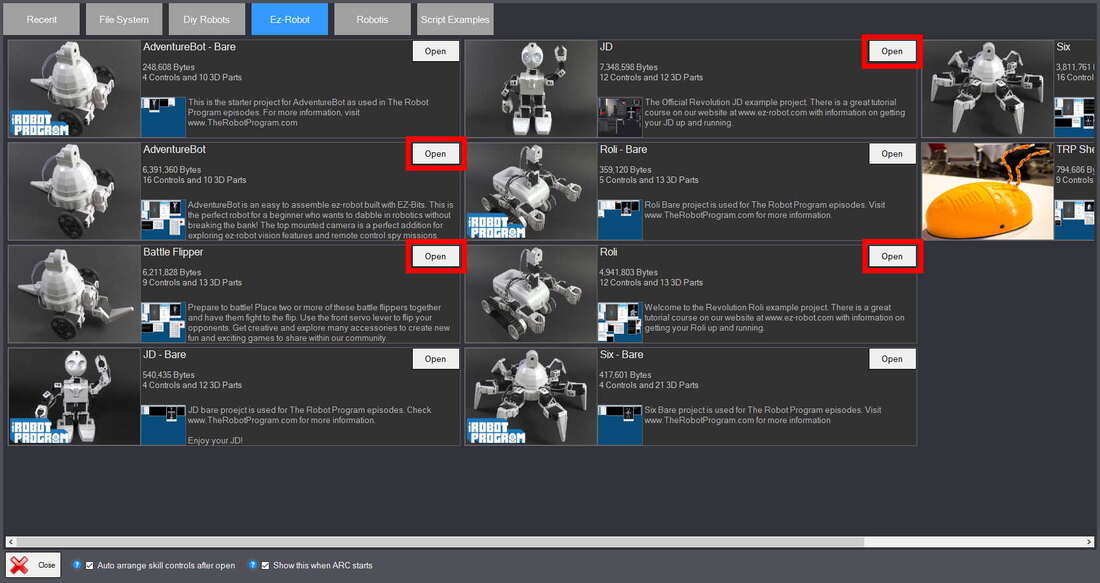
The Projects window may automatically open. If it does not, at the top left beside New, click on Open.
Click on the EZ-Robot category at the top. |

|
|
Click on the 'Open' button beside the project that corresponds to your robot.
Projects that have 'Bare' in the title are designed for educational use in a scenario where you want students to begin with a robot with limited functionality, allowing them to program custom capabilities into their own robots. In this case, do not open the Bare project. The Hexapod project is further to the right, and you can use the scroll bar at the bottom to see it. |
|
|
*At this point, ARC may ask you to log into Synthiam to sync EZ-Bit files. You can quickly create your own account by clicking on the appropriate button. Accounts can be shared between multiple installations of ARC, so if you want to have a single account for your classroom/company/family, simply create one and log into it as necessary.
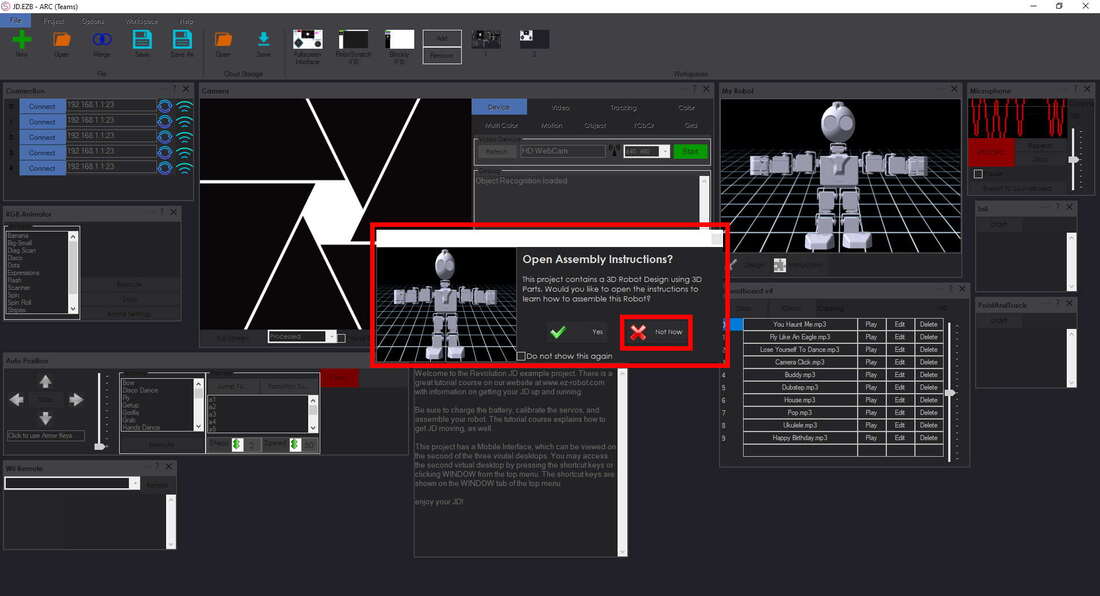
ARC may ask you whether you want to sync EZ-Bit files. If it does, click on Sync. Wait for it to finish, then click Close. ARC may ask whether you want to open the Assembly Instructions. Click on Not Now. These instructions are useful to those who have already assembled a robot before but are less useful to those building an EZ-Robot for the first time. The EZ-Robot Webinar Setup tutorial will show you where to view the video on how to build the robot. |
|
|
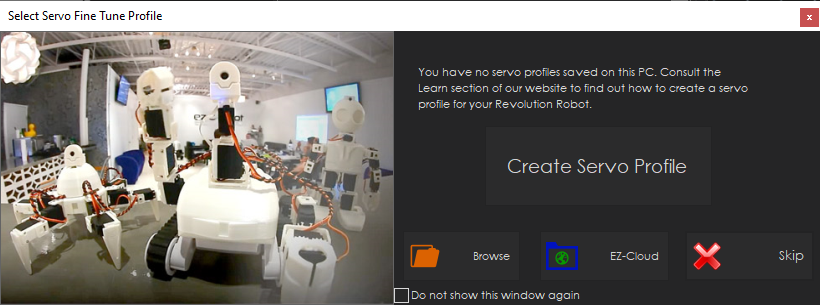
If you are using a Humanoid robot, the software may prompt you to create a servo fine-tune profile.
Click on Skip for now. Finally, please download the Presentation Project here. It should be copied into the following folder: Documents/ARC/My Projects |
|
Done!
Your software is now ready to be used.
You can find the appropriate connection tutorial here, in the 'Robot Assembly and Care' section. Once completed, your robot will be ready to roll!
Your software is now ready to be used.
You can find the appropriate connection tutorial here, in the 'Robot Assembly and Care' section. Once completed, your robot will be ready to roll!