Rotation Servo CalibrationIntroduction
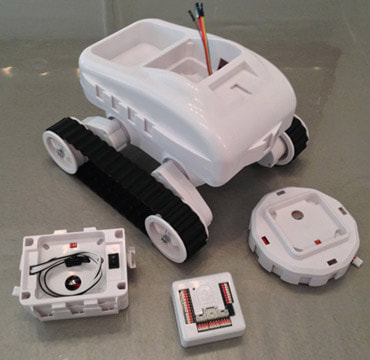
If you have servos that are significantly out of alignment when the robot is in the Calibration Position, the servos may need to be physically calibrated. This process should only need to be done once per servo. This process will require a screw driver to remove the EZ-Clip to realign it at 90 degrees. It's an easy process that should only take a few minutes. What You Will Need
Step 1 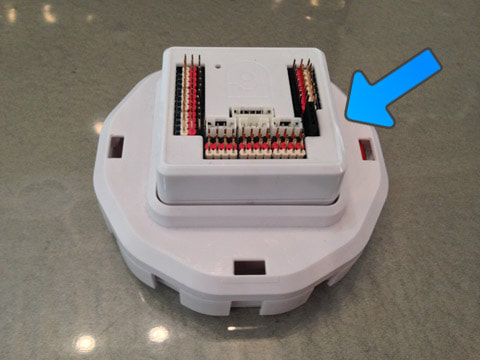
Insert the EZ-B v4 into the robot body or power base.
Step 2 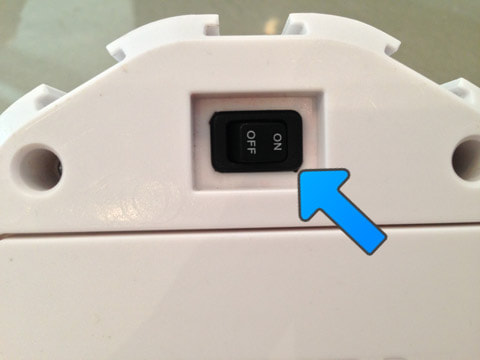
Turn the power switch to the ON or 1 position. Early EZ-Robots have a power switch labelled ON/OFF, while the newer robots are labelled with a 0/1.
Step 3 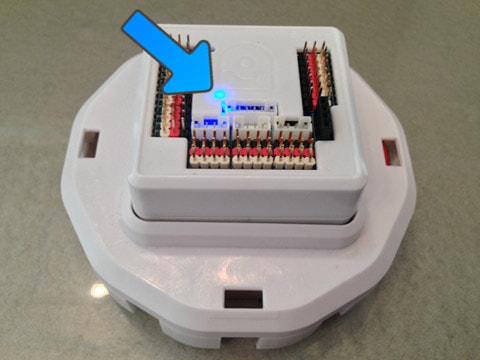
When the power switch is turned to the ON position, the EZ-B will be flashing Blue. This means it is ready for a Wi-Fi connection.
Step 4 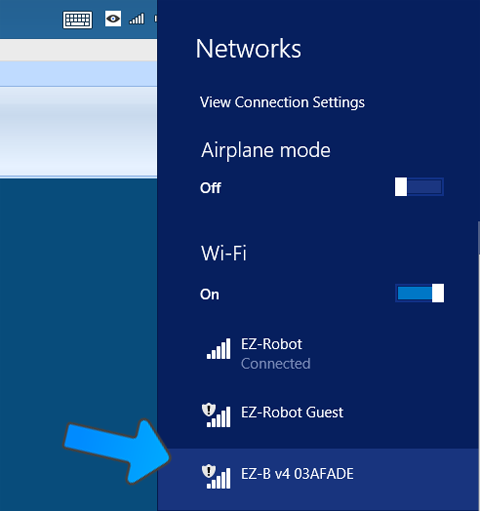
Locate the EZ-B Wi-Fi Access Point in your Wi-Fi Networks List. This is accessed by pressing the Wi-Fi button on your system tray.
Step 5 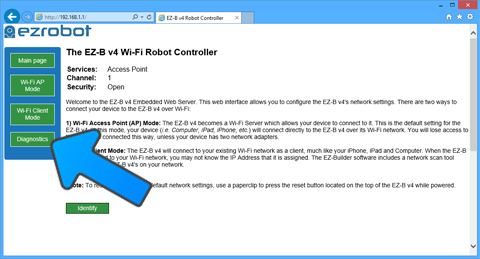
Open your web browser and type 192.168.1.1 into the top bar. Press the Diagnostic button from the left side menu.
Step 6 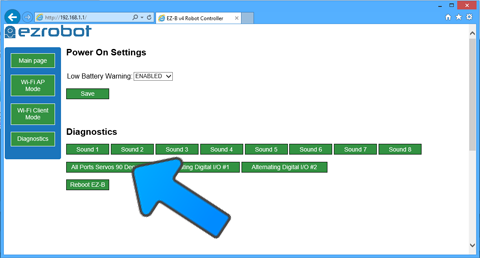
The Diagnostic page will now be displayed. Press the button labelled "All Ports Servos 90 Degrees". This will set all 24 of the digital ports on the EZ-B v4 to 90 degrees. Any servos that are connected to any digital port will now move to what it has been calibrated as 90 degrees. In the next steps, you will see how to calibrate the servo to be aligned at 90 degrees. You will repeat the next steps one at a time per servo.
Step 7 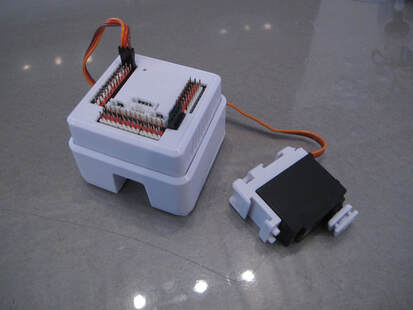
Connect one servo to the EZ-B v4 to view it's calibration position.
Step 8 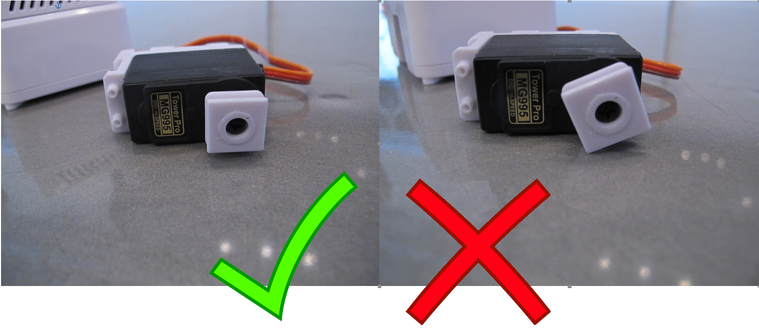
Once the servo is connected to the EZ-B v4, it will move to what it thinks is 90 degrees. Consult the image above to see what 90 degrees should look like. The male EZ-Clip connector should be flush with the surface and not angled up or down. Take notice that we use the flat surface of a counter top/table to demonstrate the alignment. You will also use a flat surface when aligning the servos. Do not "eyeball" the alignment - use a flat surface. We will go into further detail in the next steps.
Step 9 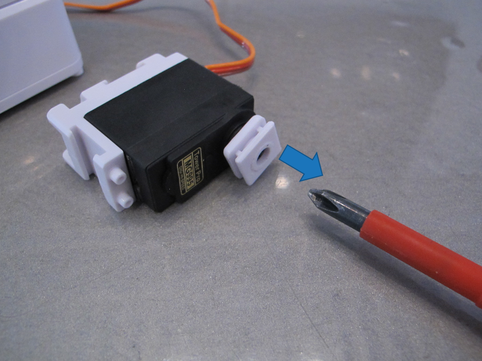
After viewing the male EZ-Clip connector alignment in the previous step, the servo may need calibrating. If the servo needs calibrating, use a Phillips screw driver to remove the screw that holds the male EZ-Clip connector onto the gear.
Step 10 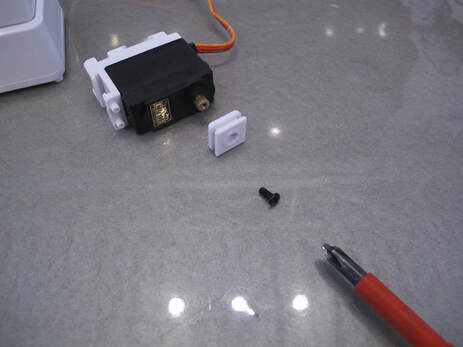
Now that the screw is removed, you can separate the male EZ-Clip connector from the servo.
*Note: Do not disconnect the servo from the EZ-B v4 until instructed to do so. Step 11 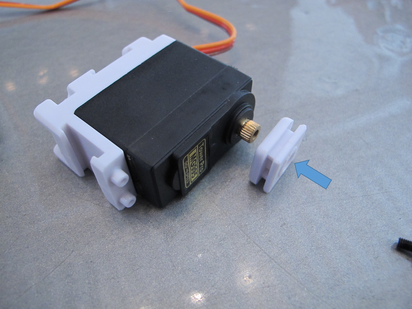
Slide the male EZ-Clip connector on the flat surface toward the servo to reconnect. The male EZ-Clip connector should now be flush (as it can be) with the servo. It is okay if the male EZ-Clip connector is a little angled by one gear tooth. This can be fine tuned in software if it causes issues with robots requiring high precision, such as JD. In most cases, robots such as Six and Roli do not need very high precision servo calibration.
Step 12 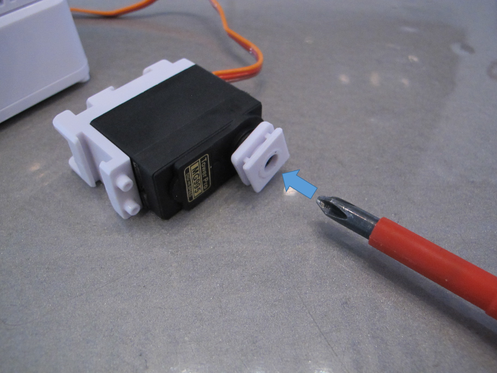
Insert the screw back into the servo gear which holds the male EZ-Clip connector and tighten it snug. Do not overly tighten, you do not want the screw to dig into the plastic. The strength of the male EZ-Clip connector from slipping is dependent on the teeth of the gears and not the tightness of the screw.
Repeat and Complete 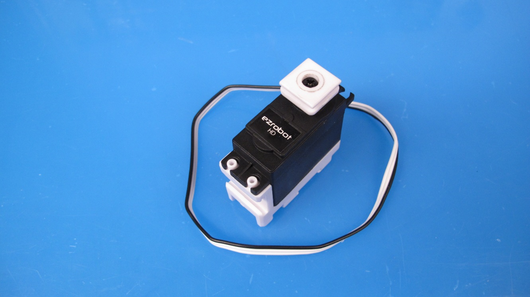
You have now calibrated your servo. Disconnect the servo from the EZ-B v4 and place it with other calibrated servos. You may now repeat this process and calibrate another servo by returning to Step 8.
|