Power Pin AdjustmentIntroduction
If your robot powers down, reboots or disconnects often, it may be due to a loose power connector. You will hear the sound of the EZ-B v4 start up during a reboot, which is much different than the sound of the EZ-B v4 disconnect. If you can identify that the EZ-B v4 is rebooting by the reboot sound, you may need to adjust the power pins on the connector. The EZ-B was created to be small and compact, and therefore uses a small power connector. The power connector is called a Micro Deans. On occasion, the Micro Deans power pins will loosen and require adjustment. This tutorial explains how to adjust the power pins by pressing the two sides closer to decrease the space and make a conductive connection. Step 1: What You Need 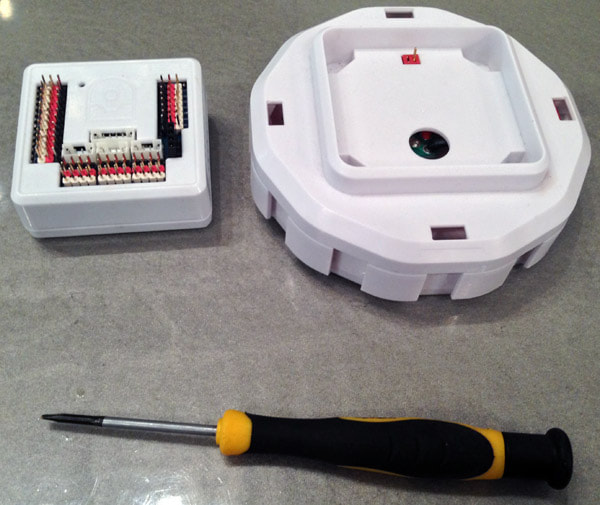
Step 2 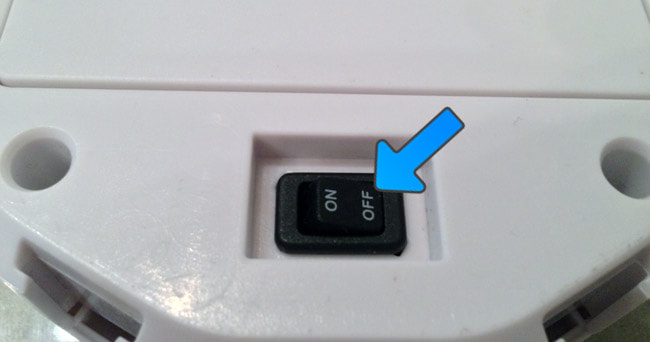
Ensure the body is powered down. The switch is located at the bottom of the body and must be in the OFF or 0 position.
Step 3 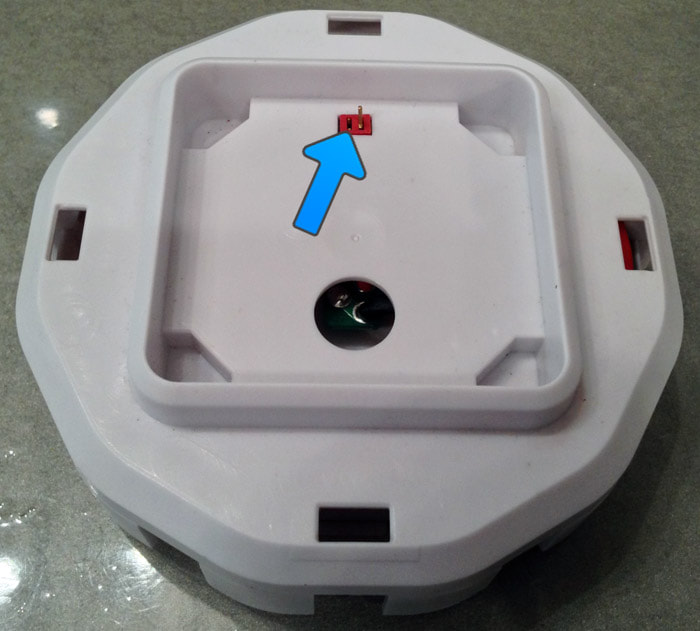
Here is the power connector that we will adjust on the body of the robot. Later, we will also make the same adjustment to the connector on the EZ-B v4.
Step 4 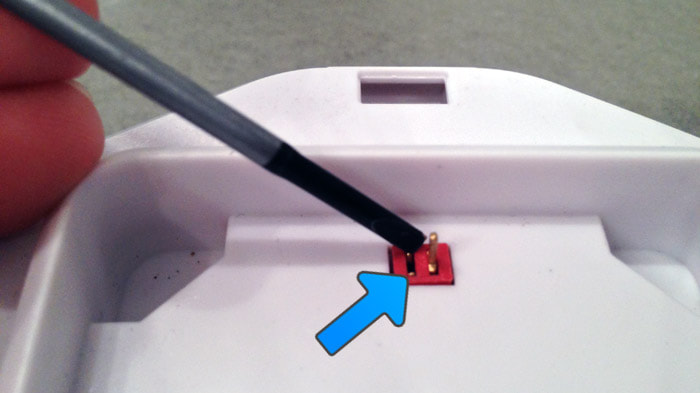
The side of the connector we are going to adjust is the Female side. Inside the hole are two small metal clips. These clips tighten against the metal pin from the male side when the connection is established. If the small metal clips are loose, the connection will not be reliable. Using the small screw driver, gently insert the flat head end between the metal clip and plastic of the connector. Now gently push the metal clip toward the center.
*Note: Do not push the metal clip too far, this picture shows how close the pins should be. Step 5 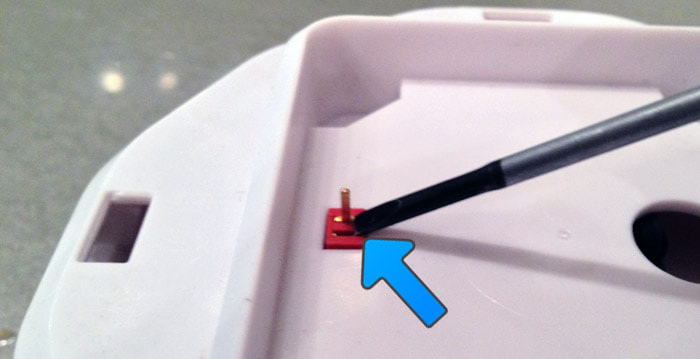
Now make the adjustment to the other side of the female connector on the body of your robot. Using the small screw driver, gently insert the flat head end between the metal clip and plastic of the connector. Now gently push the metal clip toward the center.
*Note: Do not push the metal clip too far, this picture shows how close the pins should be. Step 6 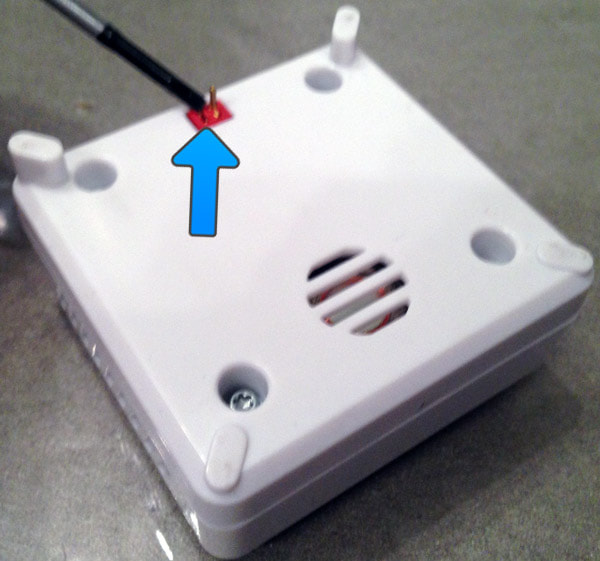
The EZ-B v4 has a matching connector with female pins that also need adjustment. Using the small screw driver, gently insert the flat head end between the metal clip and plastic of the connector. Now gently push the metal clip toward the center.
*Note: Do not push the metal clip too far, this picture shows how close the pins should be. Step 7 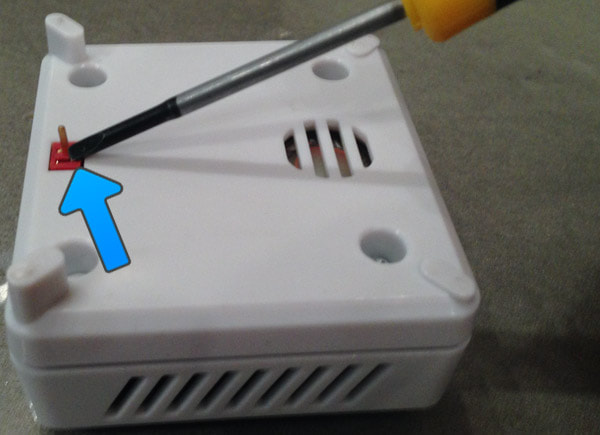
Now make the adjustment to the other side of the female connector on the EZ-B v4. Using the small screw driver, gently insert the flat head end between the metal clip and plastic of the connector. Now gently push the metal clip toward the center.
*Note: Do not push the metal clip too far, this picture shows how close the pins should be. Step 8 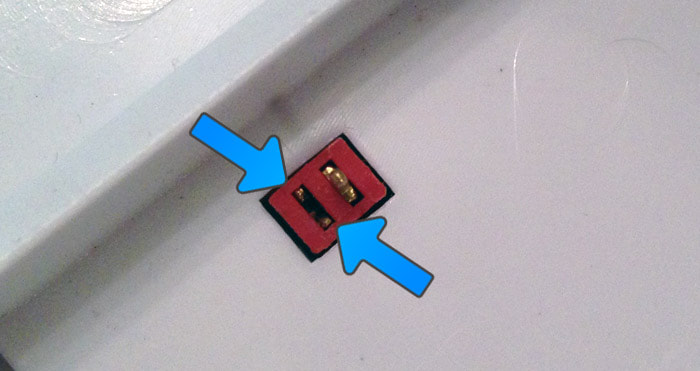
If you have pushed the pins closer, they should look similar to this photo. Once you have completed this process, the EZ-B v4 Smart Robot Controller should now fit snug into the power connector.
|