Humanoid Head CalibrationIntroduction
If you have servos that are significantly out of alignment when your humanoid robot is in the Calibration Position, the servos may need to be physically calibrated. This process should only need to be done once per servo. This process will require a screw driver to remove the EZ-Clip and realign it at 90 degrees. What You Will Need 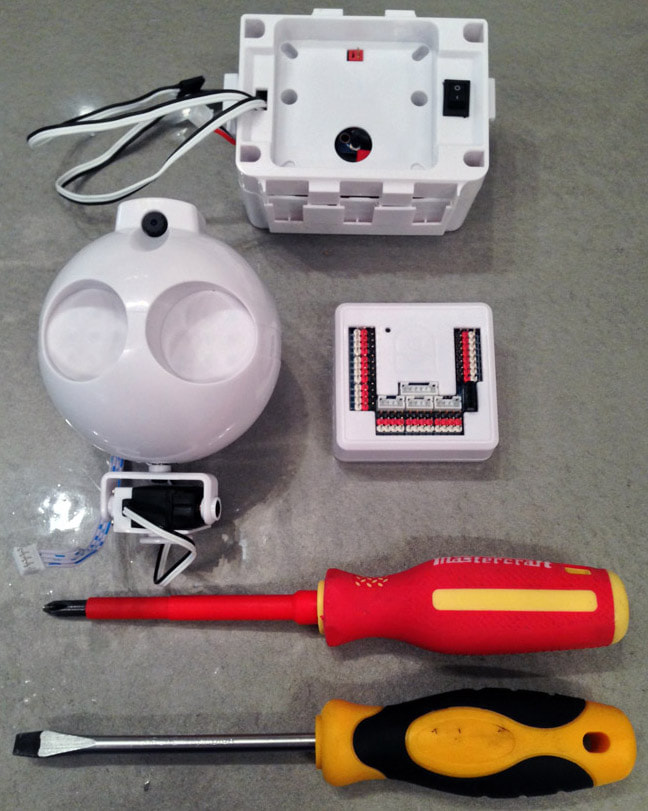
Step 1 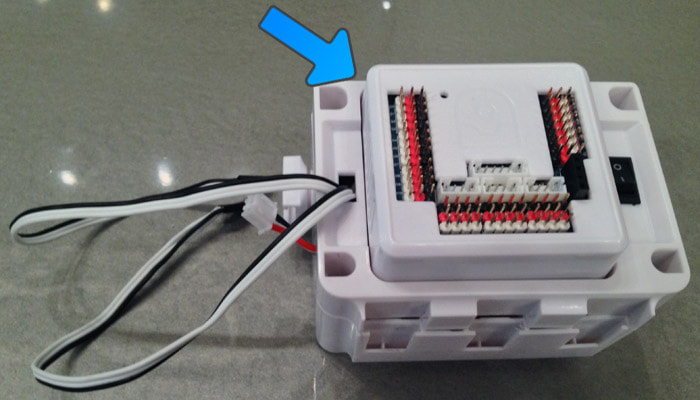
Insert the EZ-B v4 into the robot body or powerbase
Step 2 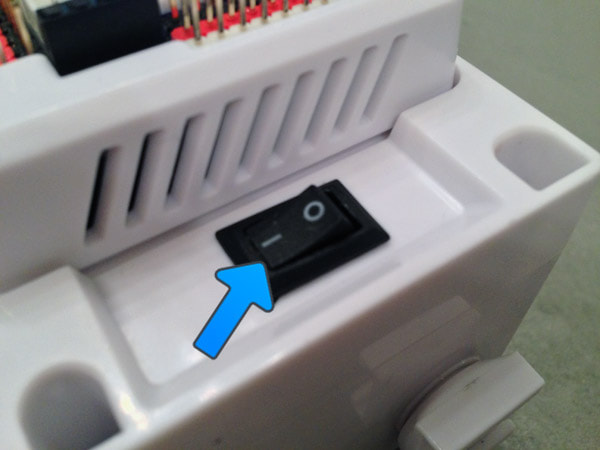
Turn the power switch to the ON or 1 position. Early EZ-Robots have a power switch labelled ON/OFF, while the newer robots are labelled with a 0/1.
Step 3 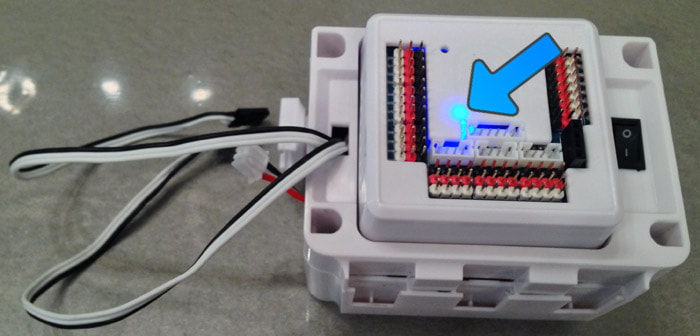
When the power switch is turned to the ON position, the EZ-B will be flashing Blue. This means it is ready for a Wi-Fi connection.
Step 4 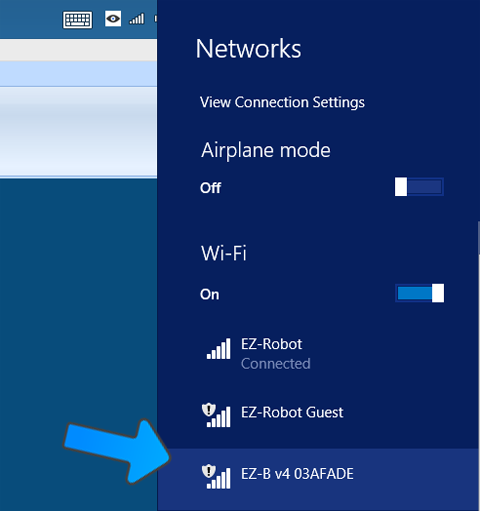
Locate the EZ-B Wi-Fi Access Point in your Wi-Fi Networks List. This is accessed by pressing the Wi-Fi button on your system tray.
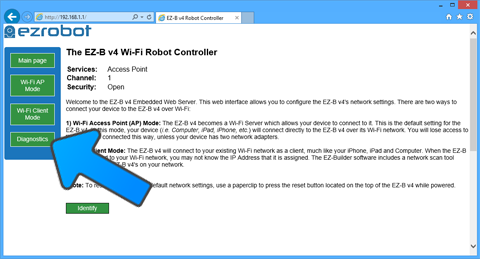
Open your web browser, and type 192.168.1.1 into the search bar and press Enter.
Your web browser will open to the EZ-B v4 Wi-Fi Web Server home page. Press the Diagnostic button from the left side menu. Step 6 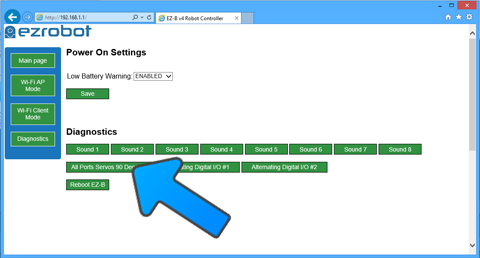
The Diagnostic page will now be displayed. Press the button labelled "All Ports Servos 90 Degrees". This will set all 24 of the digital ports on the EZ-B v4 to 90 degrees. Any servos that are connected to any digital port will now move to what it has been calibrated as 90 degrees. In the next steps, you will see how to calibrate the servo to be aligned at 90 degrees. You will repeat the next steps one at a time per servo.
Cable Descriptions 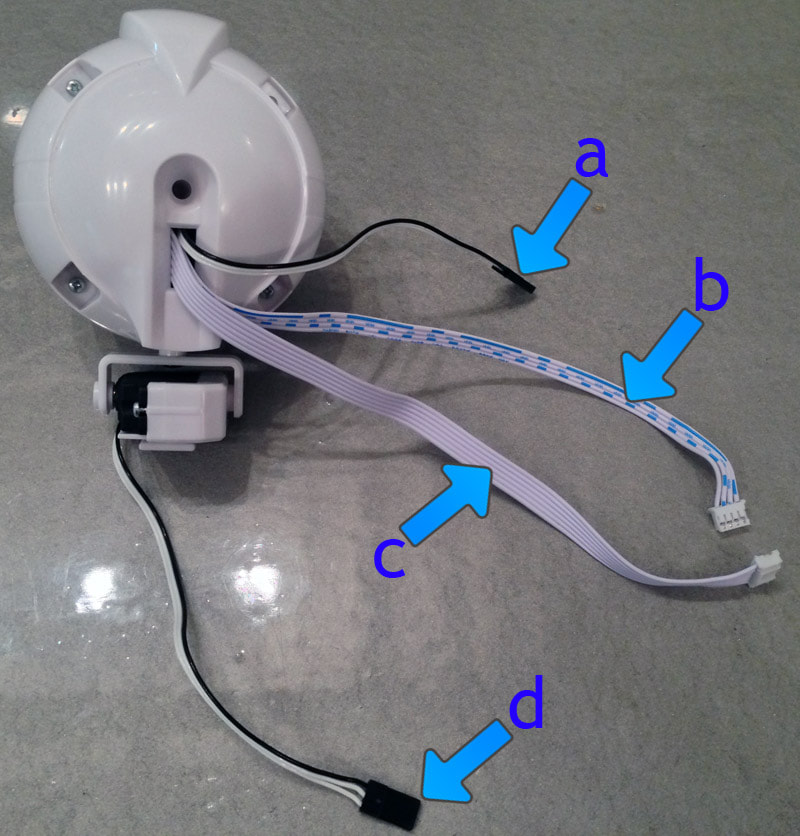
The Humanoid Head has 2 servos, an RGB LED Array and a camera. Each device within the head has a cable for connectivity. The cables are:
Step 7 
Connect the Vertical Servo wires to any of the EZ-B v4 digital ports to view the calibration position.
*Note: Do not disconnect the servos from the EZ-B v4 until instructed to do so. Step 8 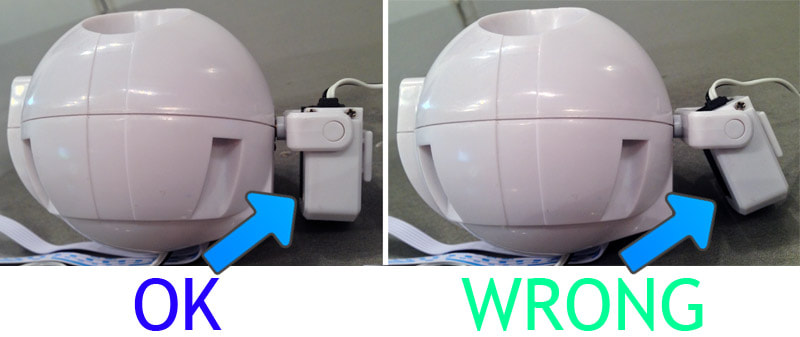
Once the vertical neck servo is connected to the EZ-B v4, it will move to what it thinks is 90 degrees. Consult the image above to see what 90 degrees should look like. If it is slightly out of alignment, then the adjustment can be made by Fine-Tuning the Servo Profile.
Step 9 
Use a No. 1 Philip Screwdriver and remove the screw which attaches the lever to the servo.
Step 10 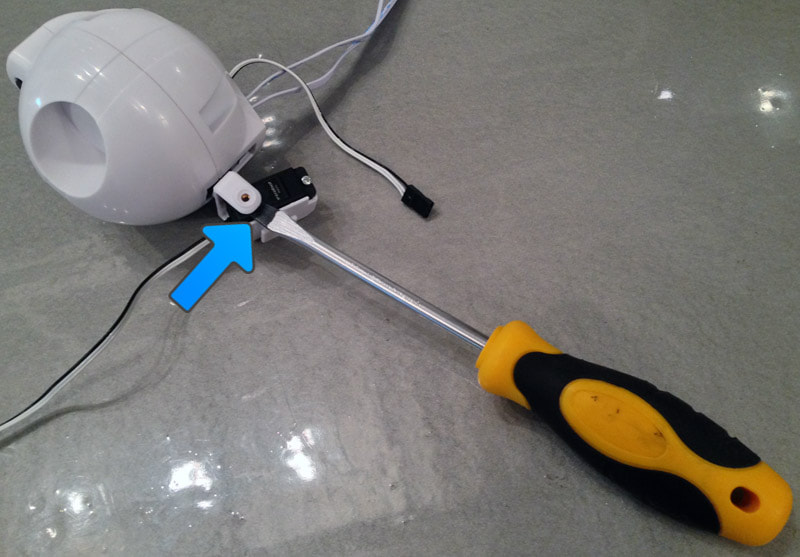
We will now separate the servo from the lever. The side of the lever which the servo gear inserts might be tight. Use a flat head screwdriver to gently pry the plastic lever from the servo gear.
Step 11 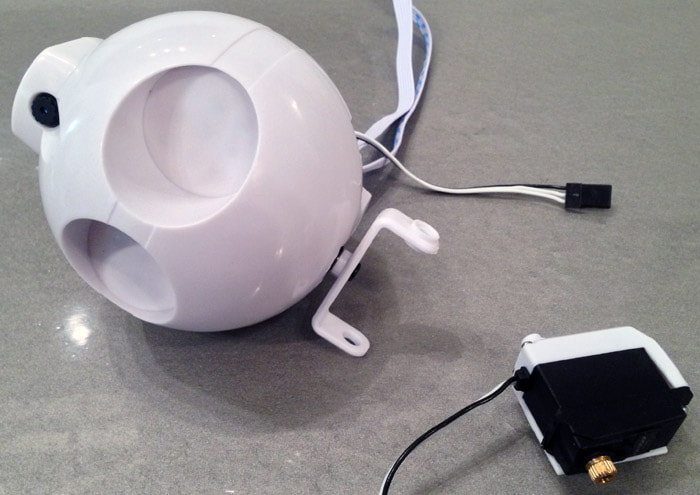
The servo will separate from the lever.
Step 12 
Connect the horizontal servo to any of the EZ-B v4's digital ports. The servo will move into what it thinks is 90 degrees.
Step 13 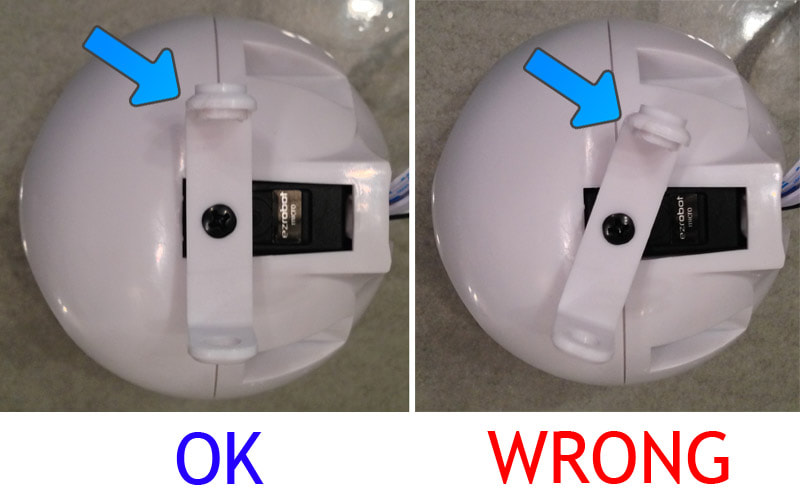
Now we will consult the horizontal servo to verify the calibration. In the photo above, notice how the horizontal servo should be positioned. If the servo is slightly out of alignment, it can be adjusted in the Fine Tune Servo Profile section, within the software.
Step 14 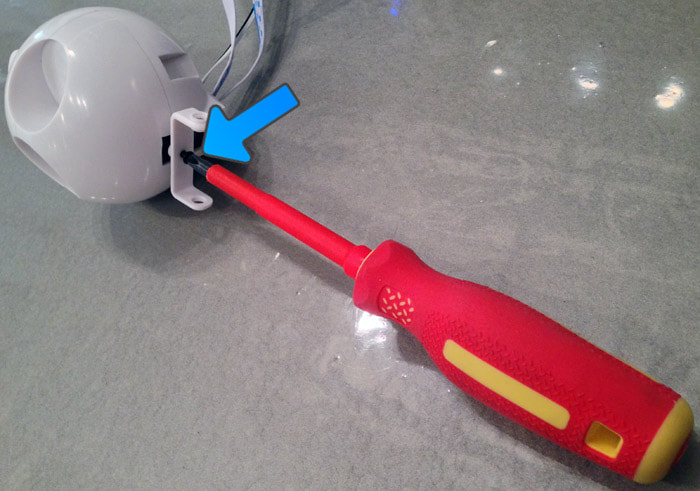
Use No. 1 Philips Screwdriver to remove the screw which attaches the lever to the horizontal servo.
Step 15 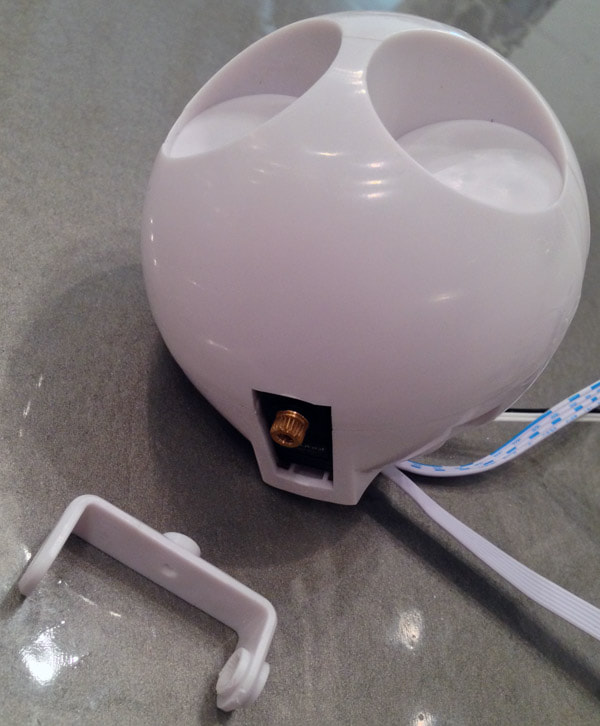
Pull the lever off of the servo gear to separate and detach.
Step 16 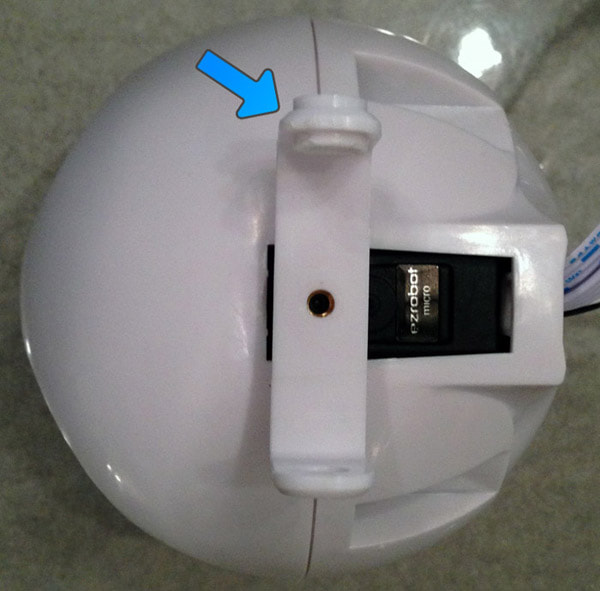
Attach the lever to the servo in the same direction as the above photo. Notice the orientation of the lever alignment. Ensure the lever is positioned the correct way as in the photo, or the servo will not attach correctly.
Step 17
Use a No. 1 Philips Screwdriver and tighten the screw into the lever and servo gear. Tighten snug, not overly tight. The screw holds the lever onto the servo gear to prevent slipping. It does not need to be incredibly tight, which could warp or crack the plastic.
Step 18 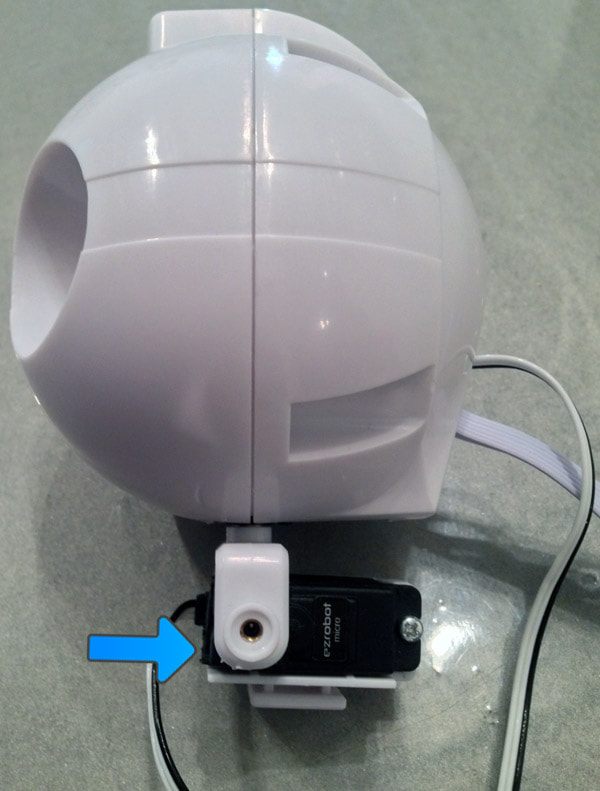
Attach the vertical servo to the lever. Take note of the angle that the servo is installed to the lever. The Servo is aligned at a right angle (90 degrees) from the lever.
Step 19
Insert the screw and tighten with a No. 1 Philips Screwdriver. Tighten snug, not overly tight.
Repeat and Complete You have now calibrated your Humanoid Head. Disconnect the servo from the EZ-B v4 and place it with other calibrated servos. You may now repeat this process and calibrate another servo by returning to Step 8. |